構図やポーズ、持物をこちらで指定して、詳細な描写はAIに任せようという手抜きでズルい制作手法を身に着けたくなって(だってそうしないと量産できねえし)
色々試した結果の結論から書くと、
「Controle Net Mode:Priotitize Prompt」「Controle Net Model:Canny」「Controle Net Weight:1より高め」「Image Mode:Standard」が良い感じだ
目次(クリックでジャンプ)
準備
下絵の準備
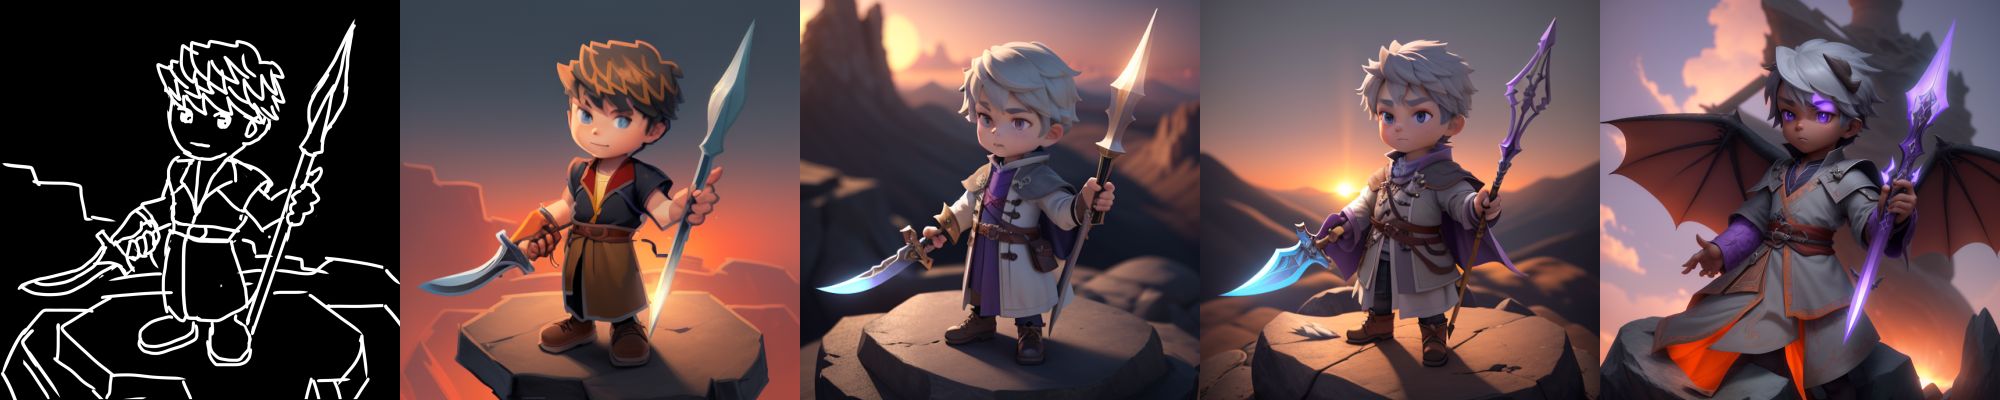
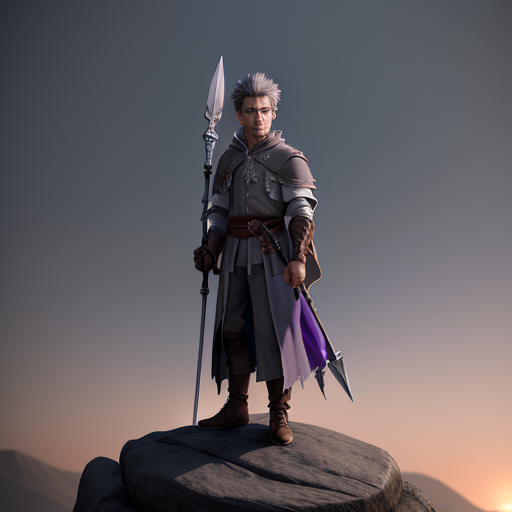
まずお絵かきソフト(iPad用のprocreate)で線画を描く。
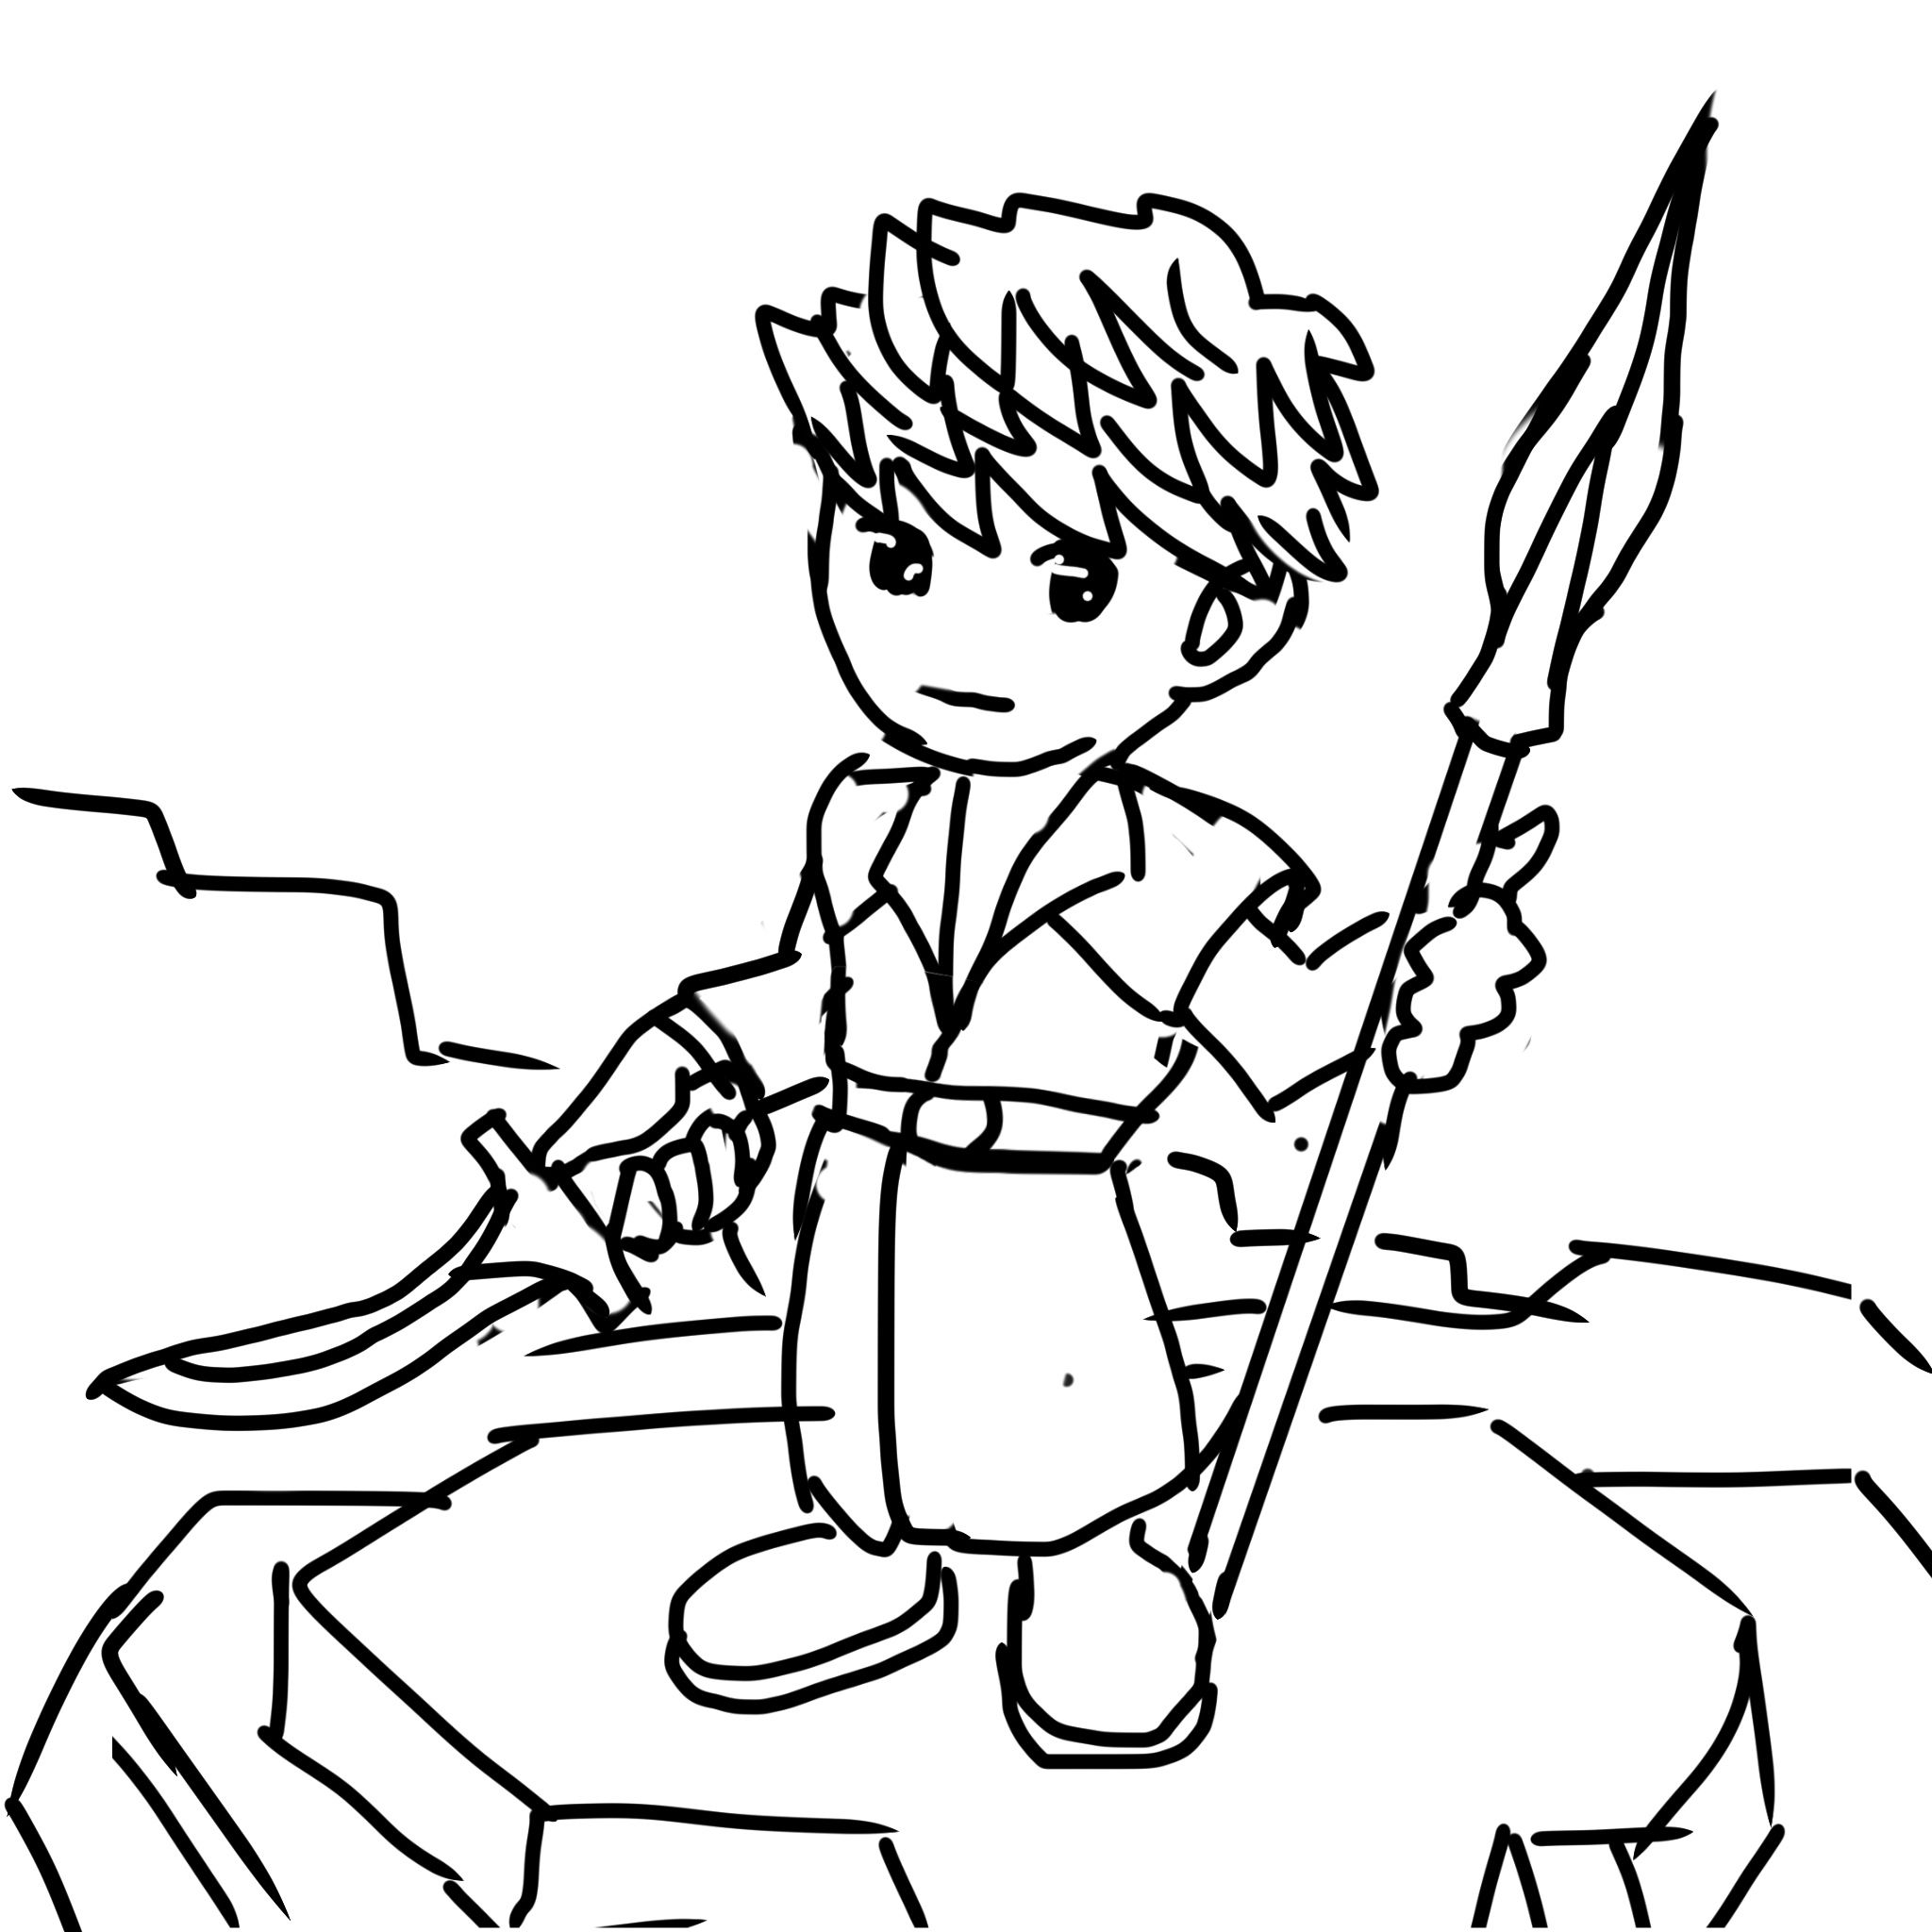
岩場で遠くを見張る冒険者みたいなイメージ
指で書いているので詳細な描写や正確なコントロールはできない(いつもの言い訳)
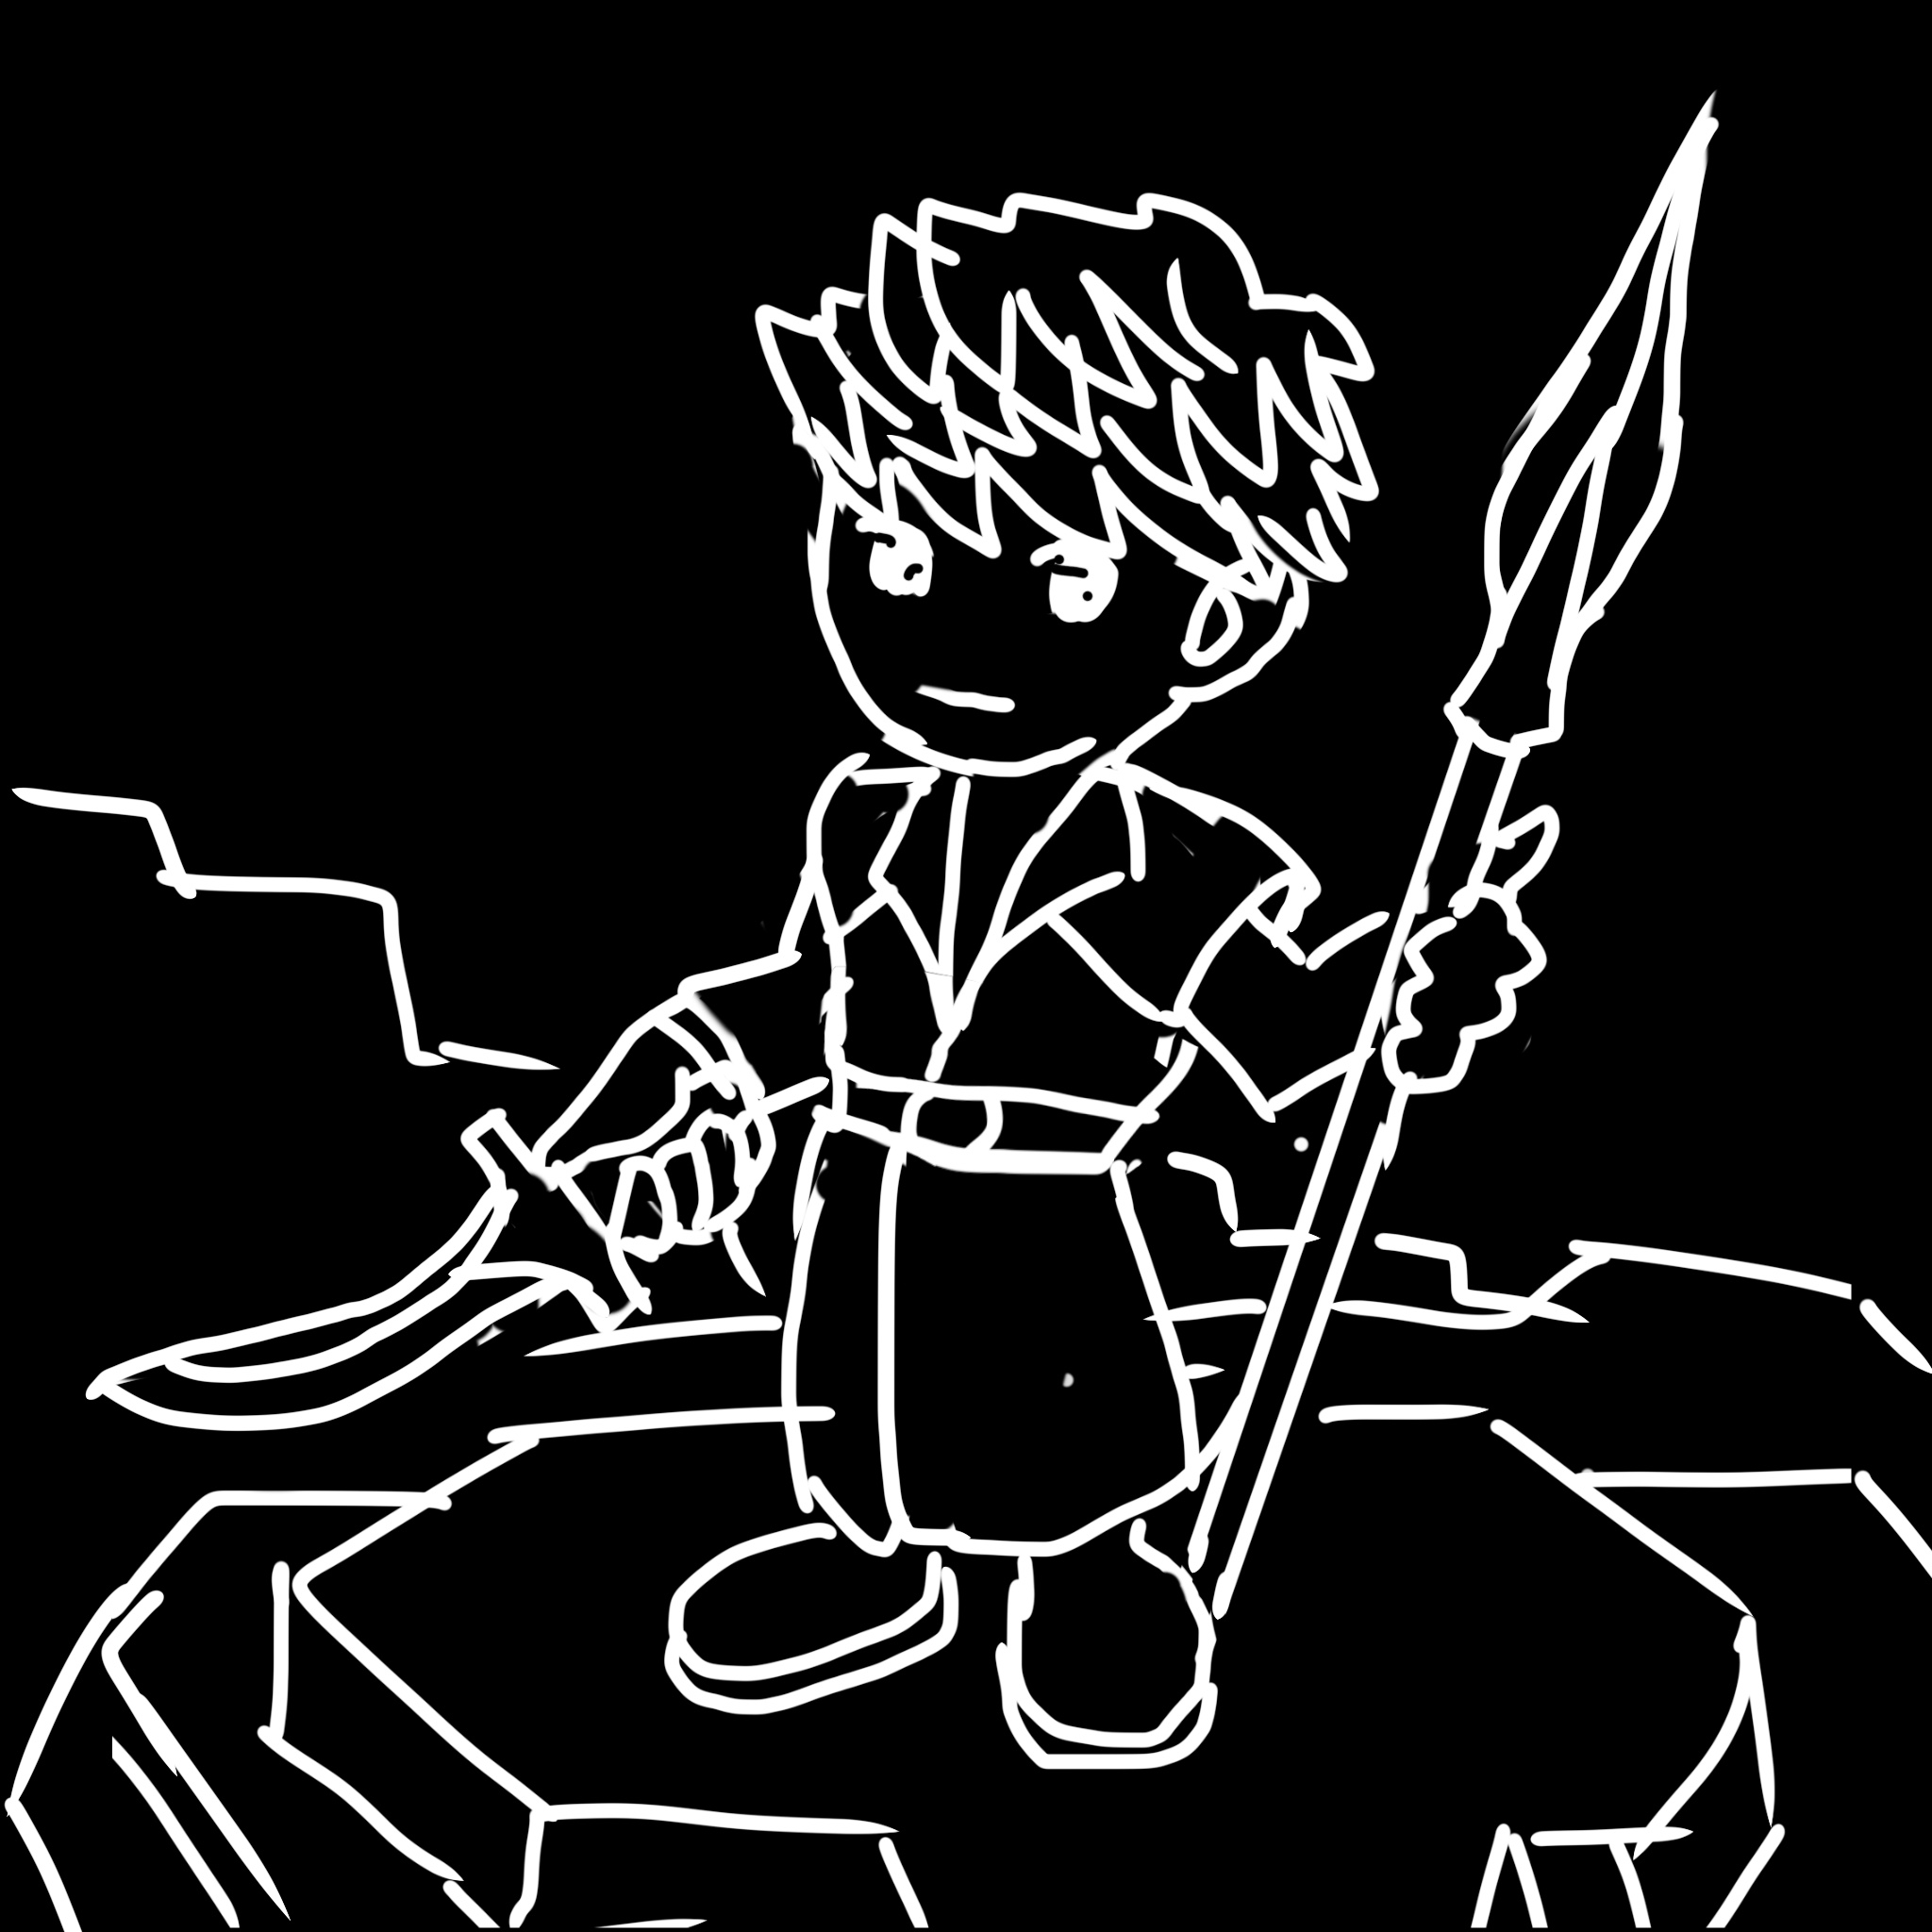
注意点は、出来るだけ線が二重にならないように描くこと。
これを白黒反転させて元絵にする(この方がAIが認識しやすいため)
テスト作成
「SeaArt」にログインして、「Generate」「ControleNet」にアクセスして、中央のフレームに上で作った元絵をアップロードする。
フレーム下の「Intelligent Analysis」のスイッチを入れるとAIがプロンプトやモデル・LoRAなどを自動で設定してくれるので、そのまま作成してみる。
ControleNetの設定で注意することは「Preprocessor」を「No」にすること(既に白黒半された線画をアップロードしているため)
単なる塗り絵になっとる(汗)
(後述するような)設定を色々変えてみてもこんな感じ

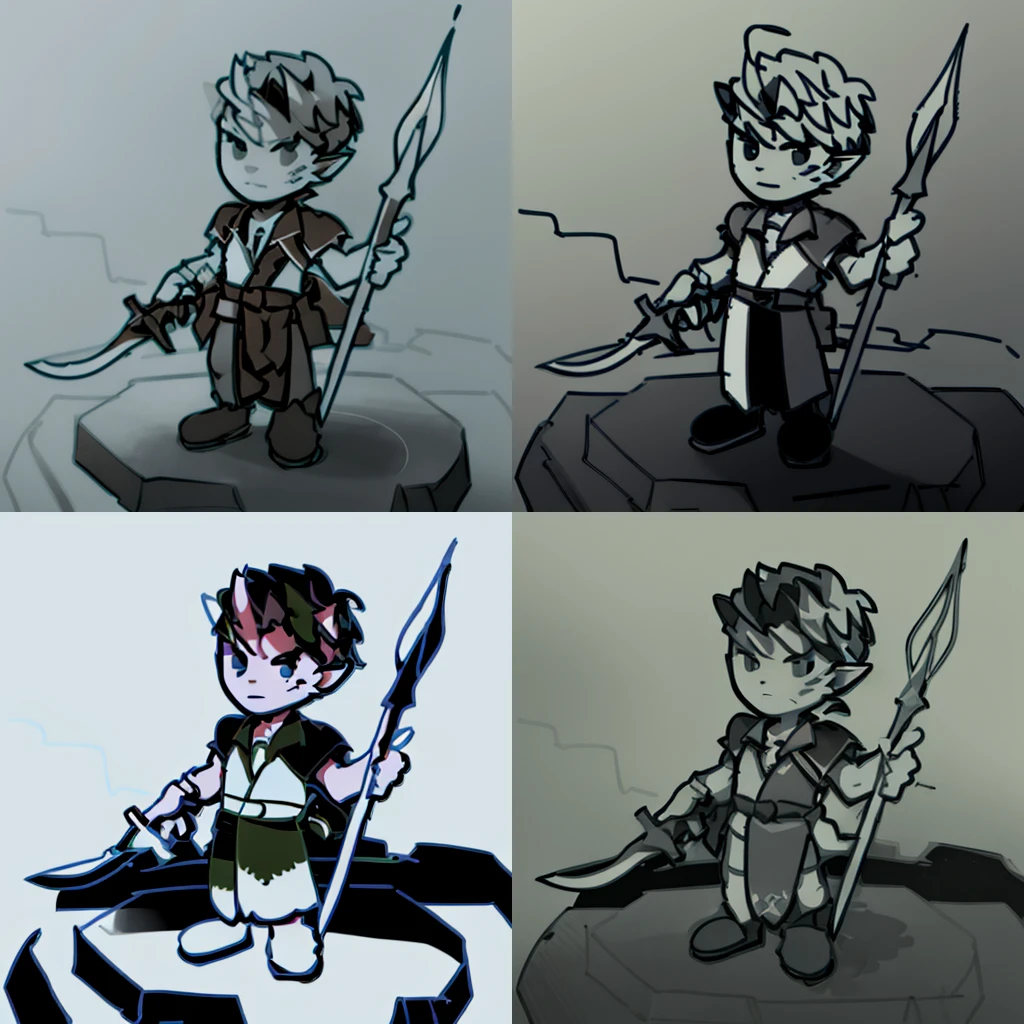
あかんね…
自動で設定されたプロンプトを見てみると…「a drawing of a boy with a sword and a shield, drawn in microsoft paint, simple lineart, hold spear, holding a spear, holding his trident, bold lineart, holding spear, intense line art, outlined art, wielding a spear, young half elf wizard, pointing his bow, simple line art, bold line art, sharp lineart, animatic」となっていて、線画であることばっかり強調されているので、プロンプトを変更してみる
プロンプトとモデルの変更
そこでプロンプトを自分で入れ直して(SeaArtは日本語でもいけるが、元のプロンプトを一部残すので英語にした。文法目茶苦茶だが)
「a drawing of a boy holding a sword in his right hand and spear in his left.he is standing on plane rock in the mountain area at dusk.beautiful sky.high quality.masterpiece.sunset.」
モデルも使い慣れた「Rev Animated」に変えて、作成する

ControleNetの設定は
「Type」は「Canny」
「Preprocessor」を「No」に
「ControleMode(画像とプロンプトの優先度)」は「Balanced」
「ControleWeight(コントロールネットの強さ)」は「1(標準)」
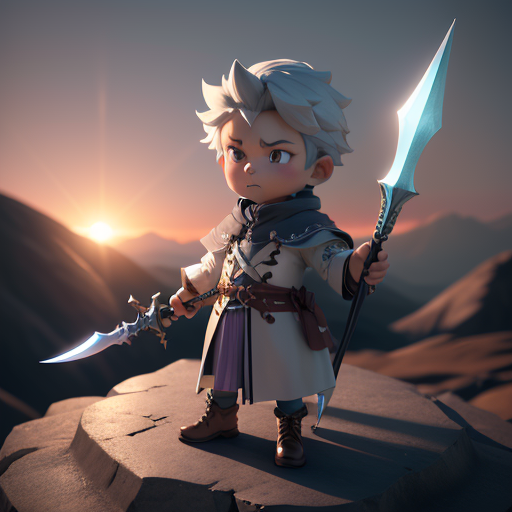
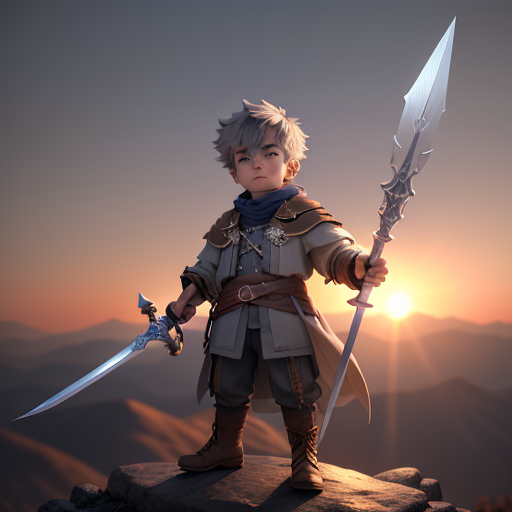
まあまあ、自分のイメージに近くなってきた。
プロンプトにライティング等を加筆して
「a drawing of a boy holding a sword in his right hand and spear in his left.he is standing on plane rock in the mountain area at dusk.he is lighted from the front by sunlight and shadow is casted down on the ground.beautiful sky.high quality.masterpiece.sunset.detailed expression of hands and fingers.」
同じ条件で作成すると
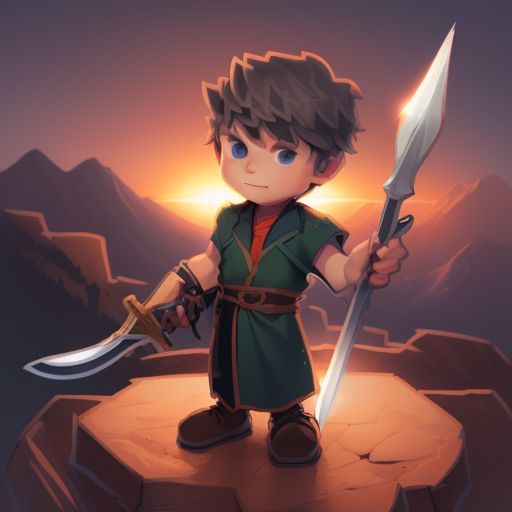
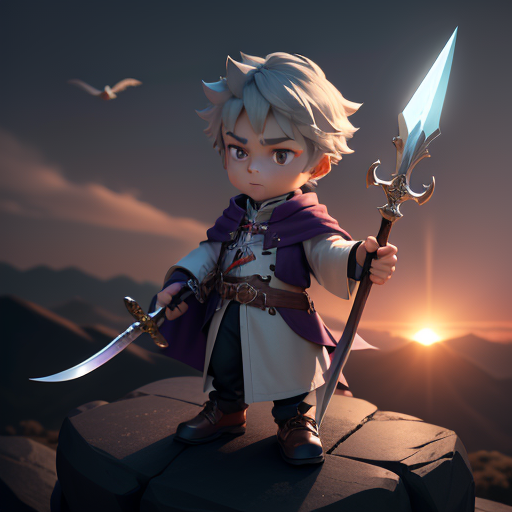
少し変化したが、自分はAIに作らせるならピクサーCGのような画像が欲しいので、プロンプトの初めをdrawingから3D rendarに変えてみる
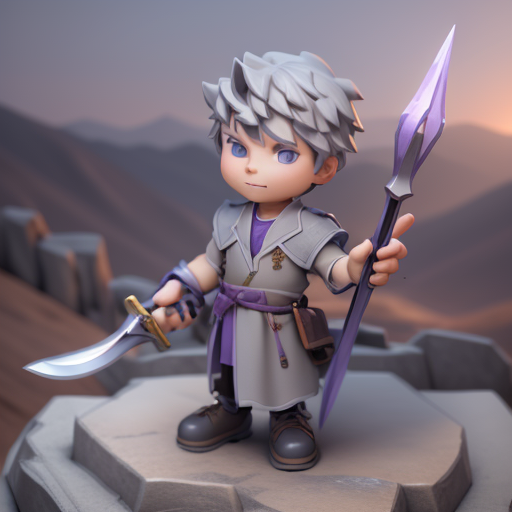
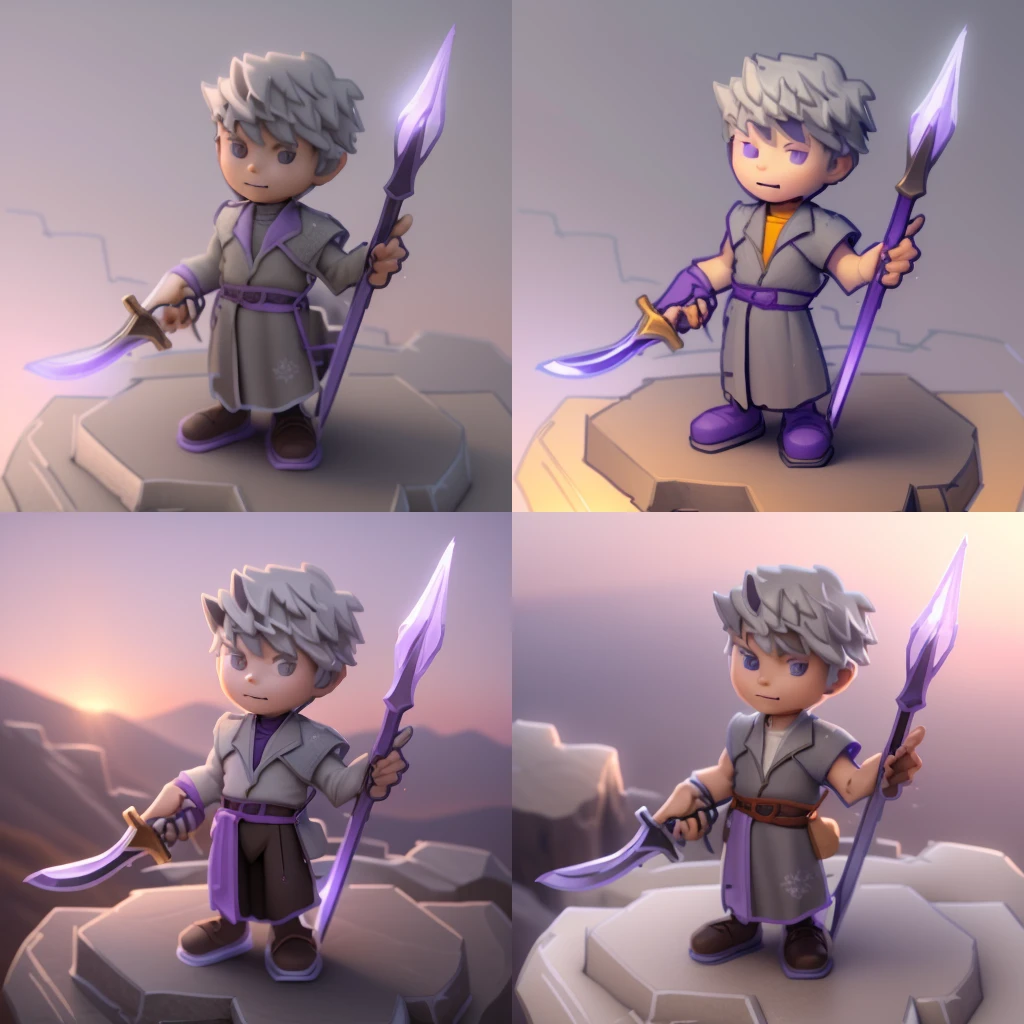
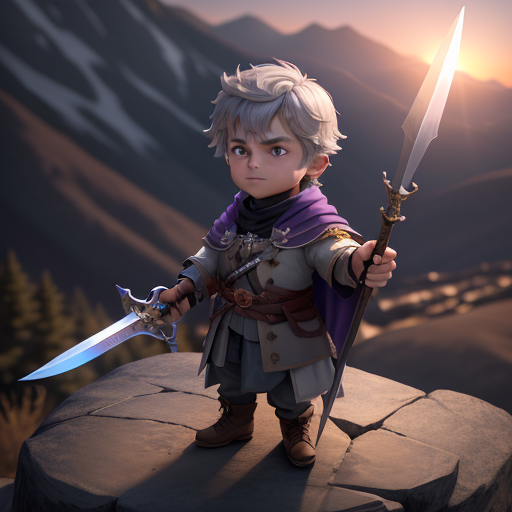
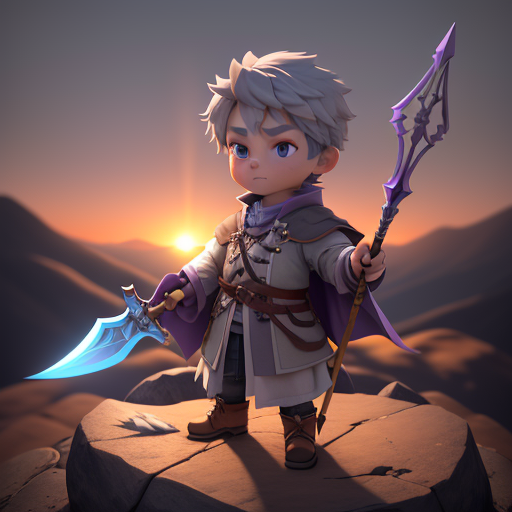
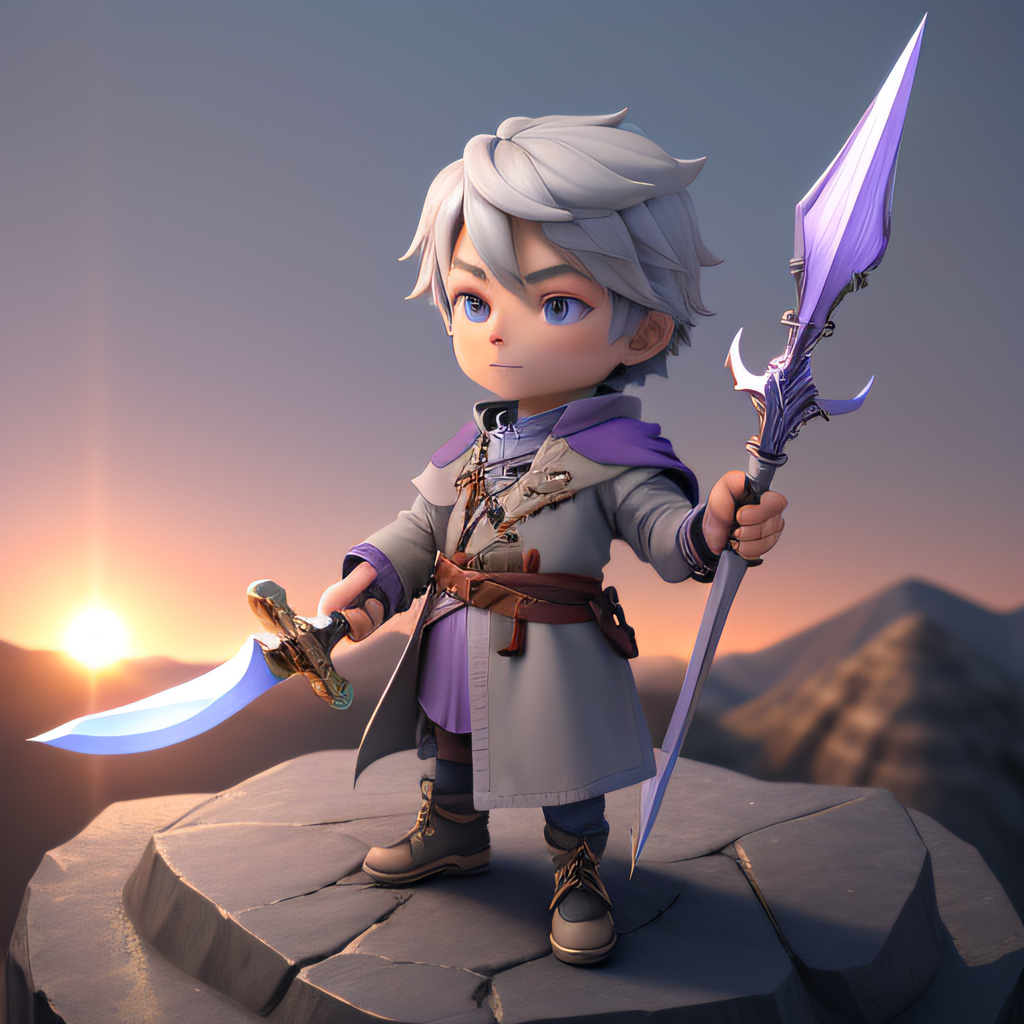
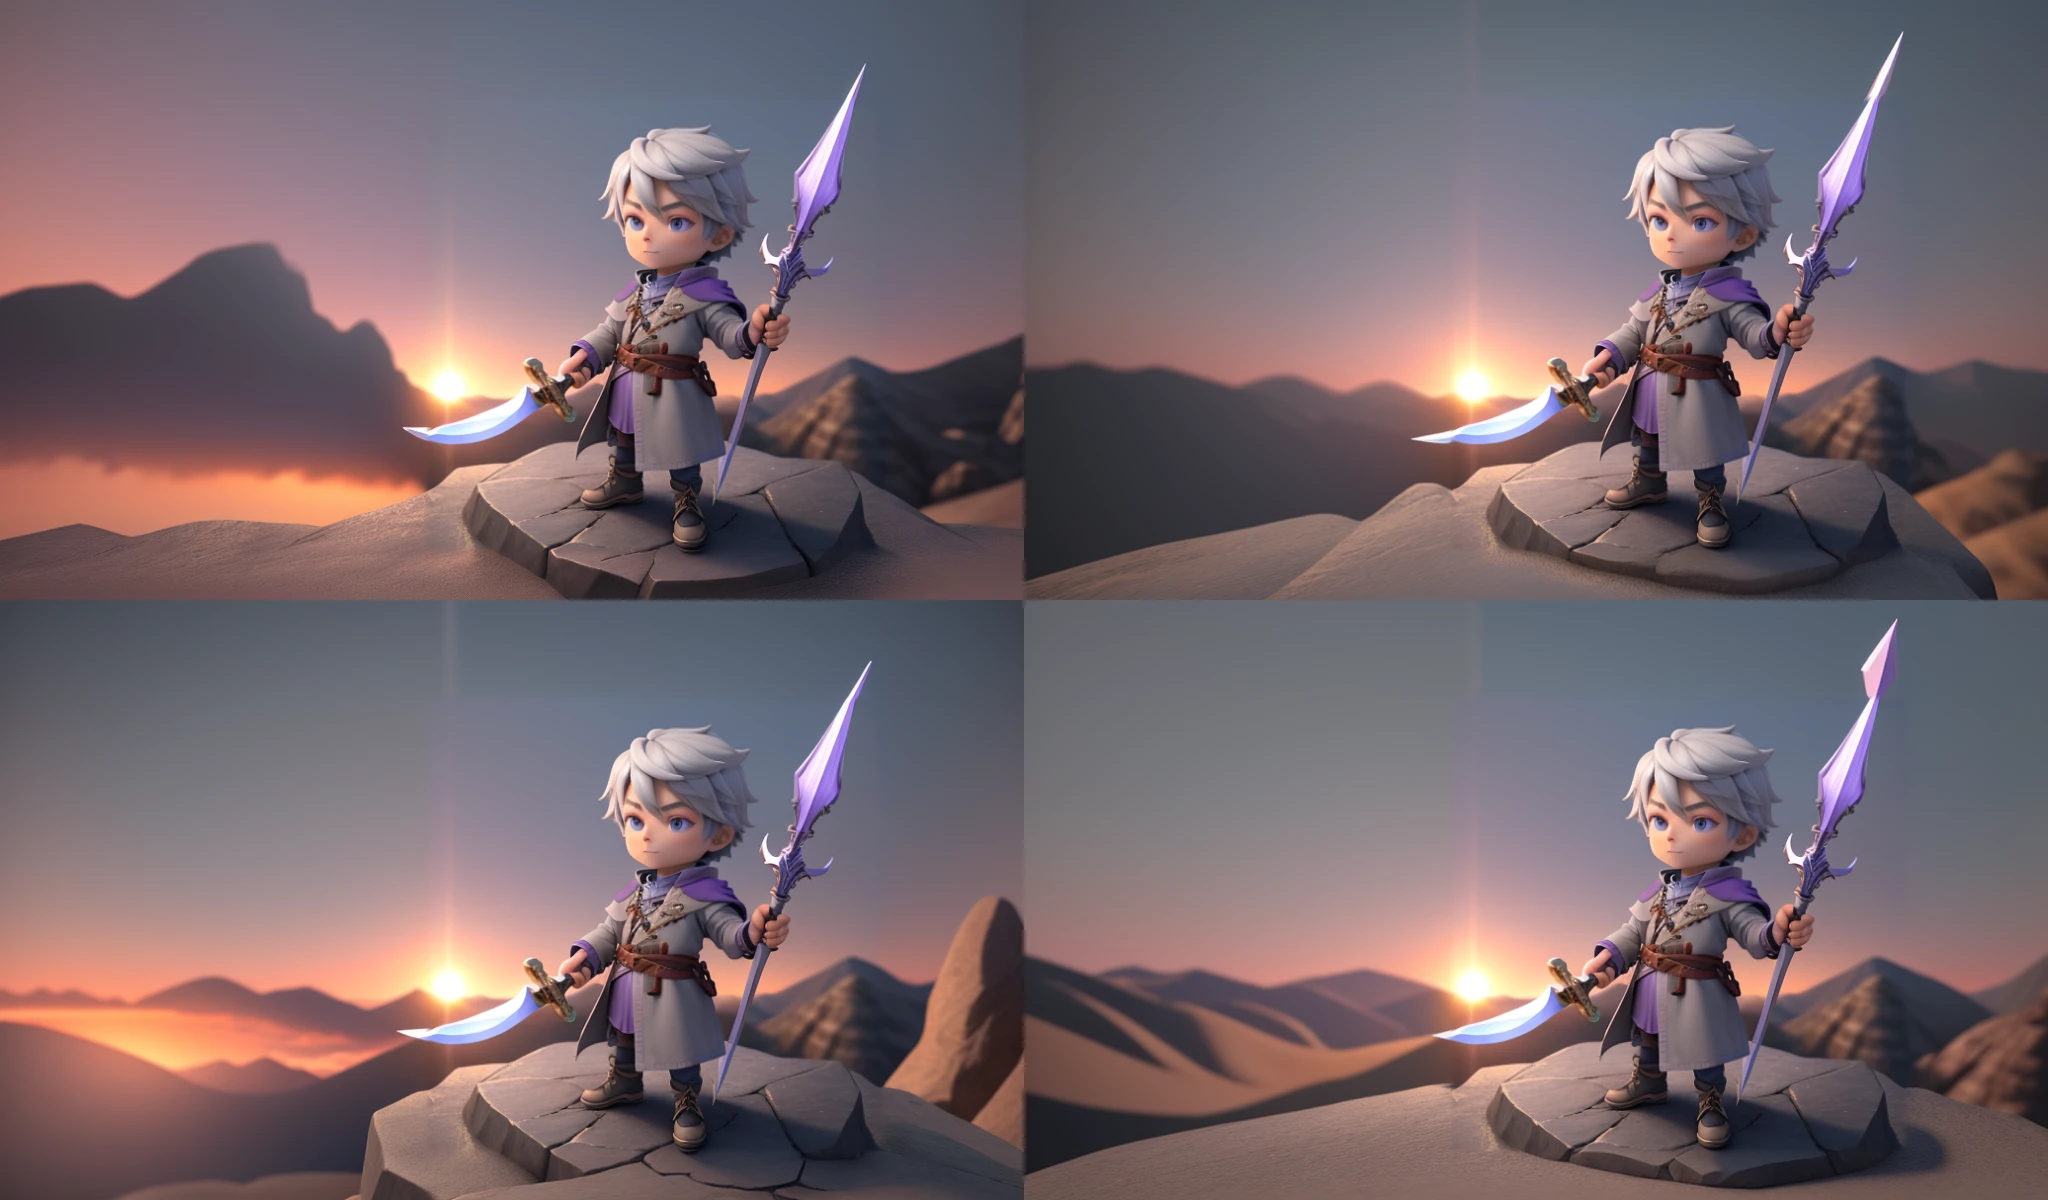
「3D render of a boy holding a sword in his right hand and spear in his left.he is wearing a surcoat colored in gray and violet and standing on the top of rocky hill in the mountain area at dusk.he is lighted from the front by sunlight and shadow is casted down on the ground.beautiful sky.high quality.masterpiece.sunset.detailed expression of hands and fingers」あとの設定は同じままで作成すると
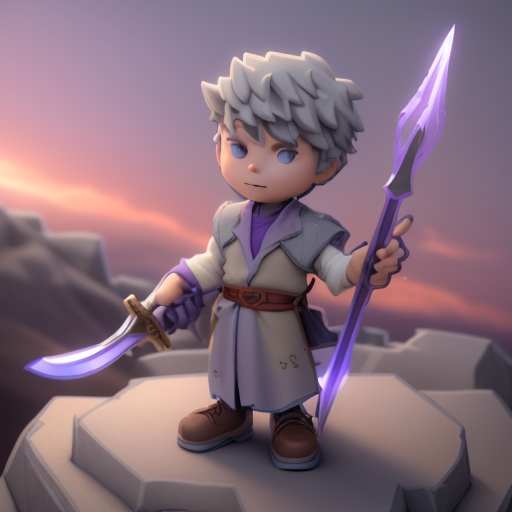
背景含めて「出来上がった」感じになったが、顔の描写がさっきに比べてイマイチなので
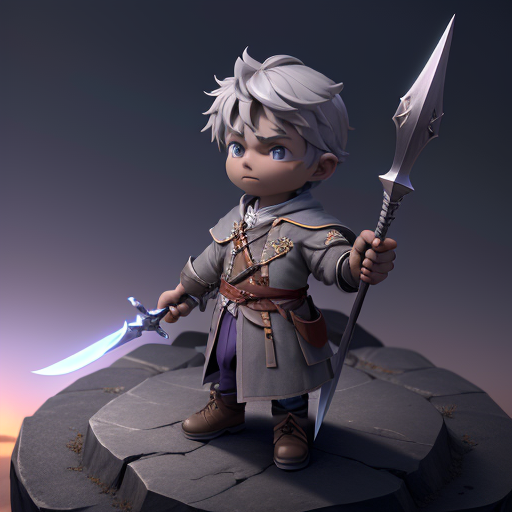
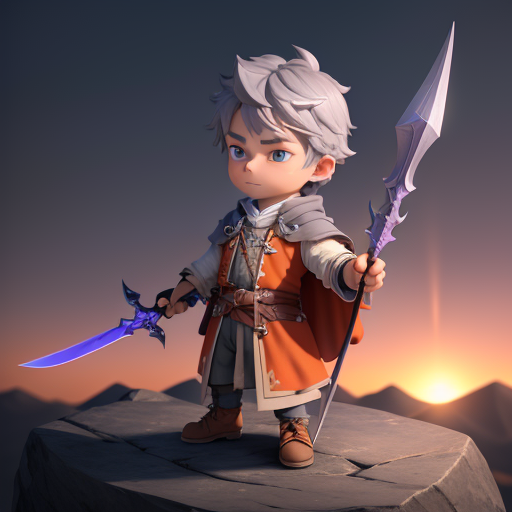
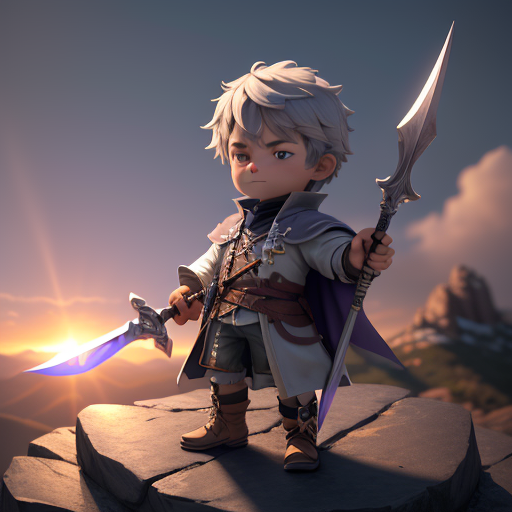
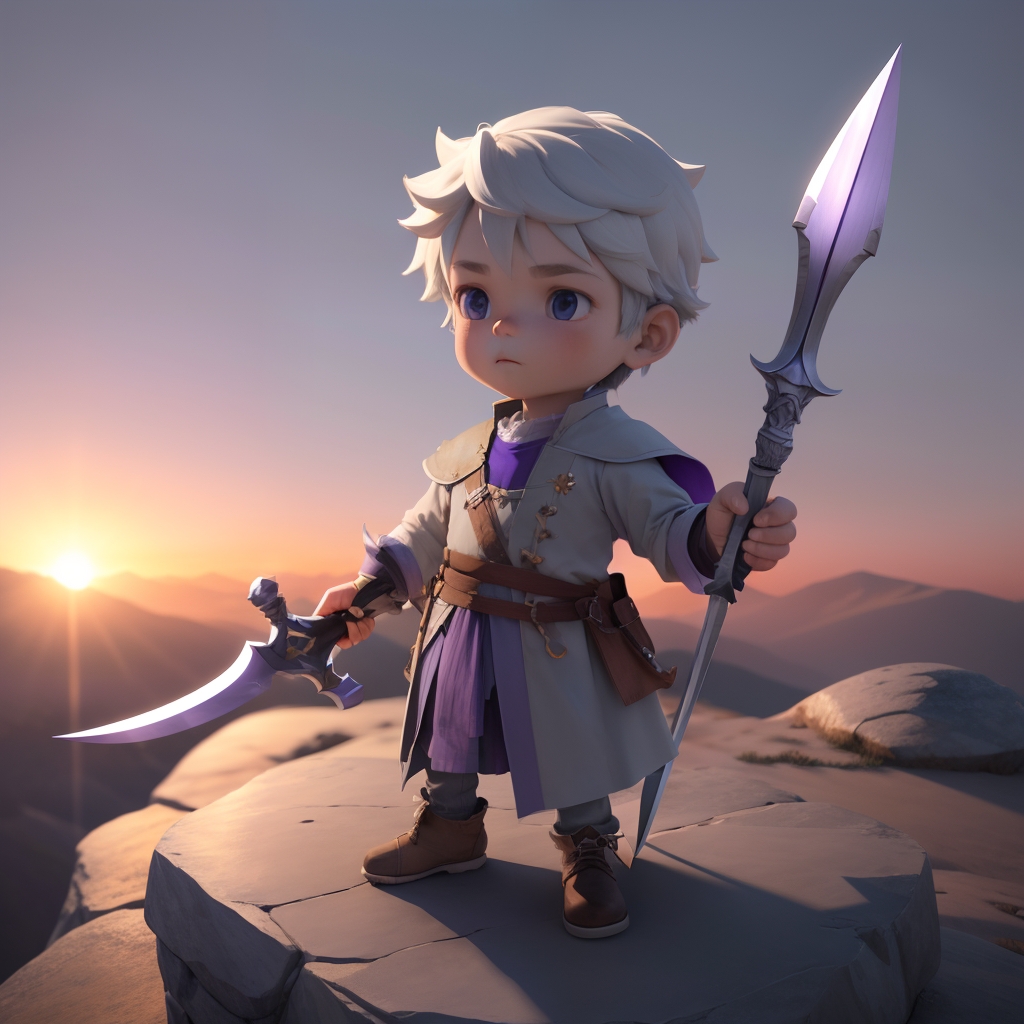
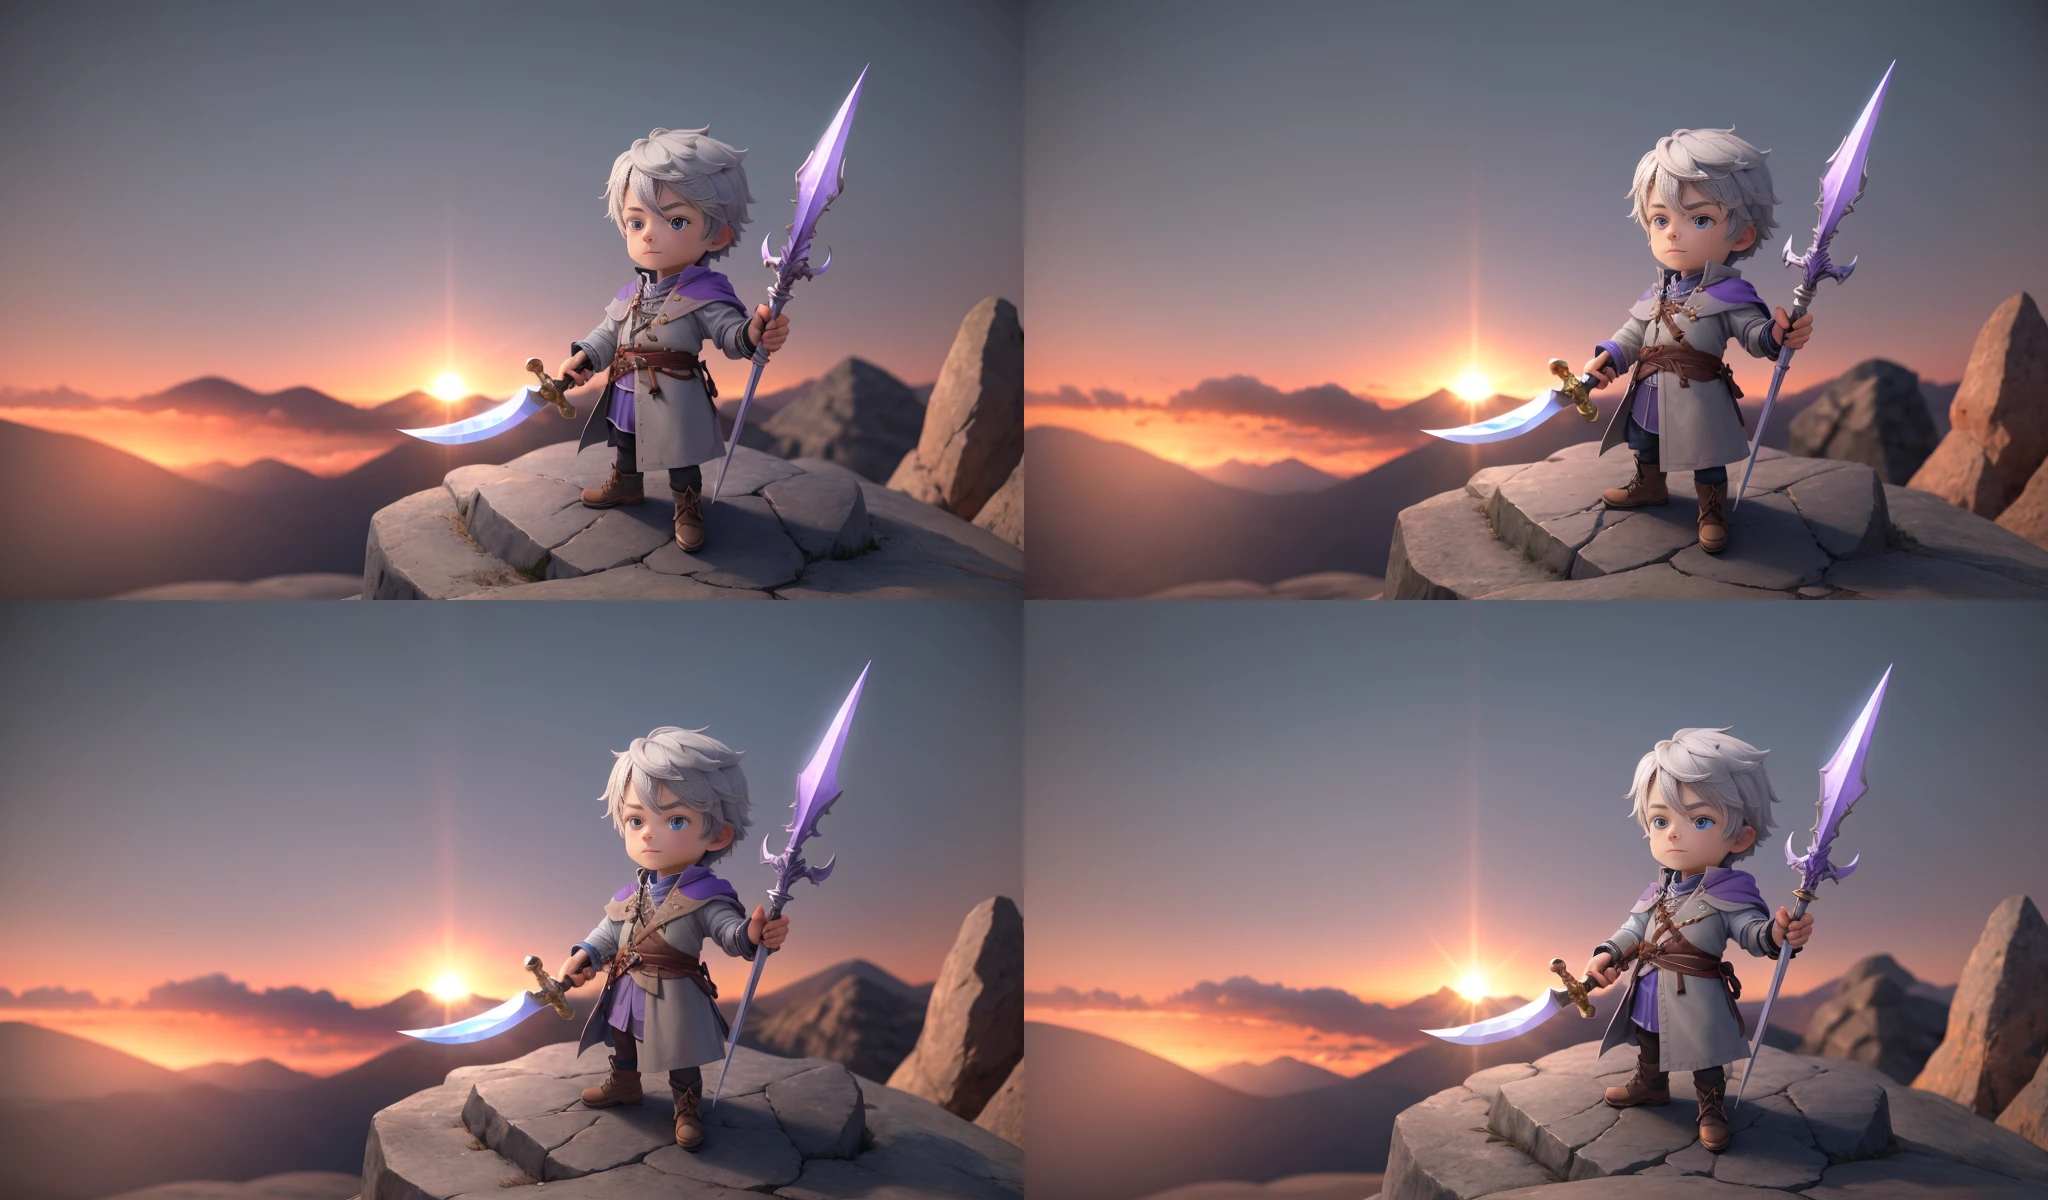
プロンプトに「beartiful」「cute」などを追加
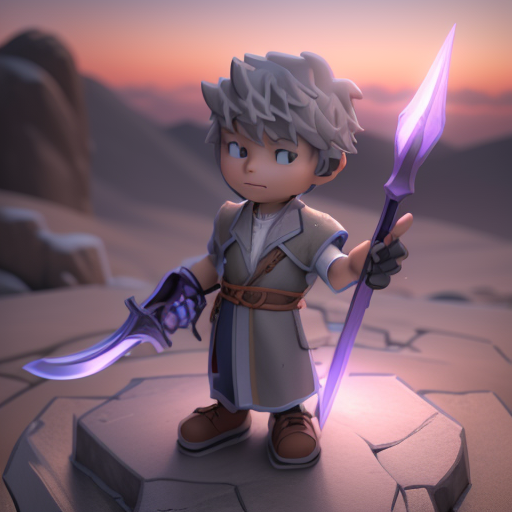
「3D render of a beautiful and cute boy holding a sword in his right hand and spear in his left.he is wearing a surcoat colored in gray and violet and standing on the top of rocky hill in the mountain area at dusk.he is lighted from the front by sunlight and shadow is casted down on the ground.beautiful sky.high quality.masterpiece.sunset.detailed expression of hands and fingers.」
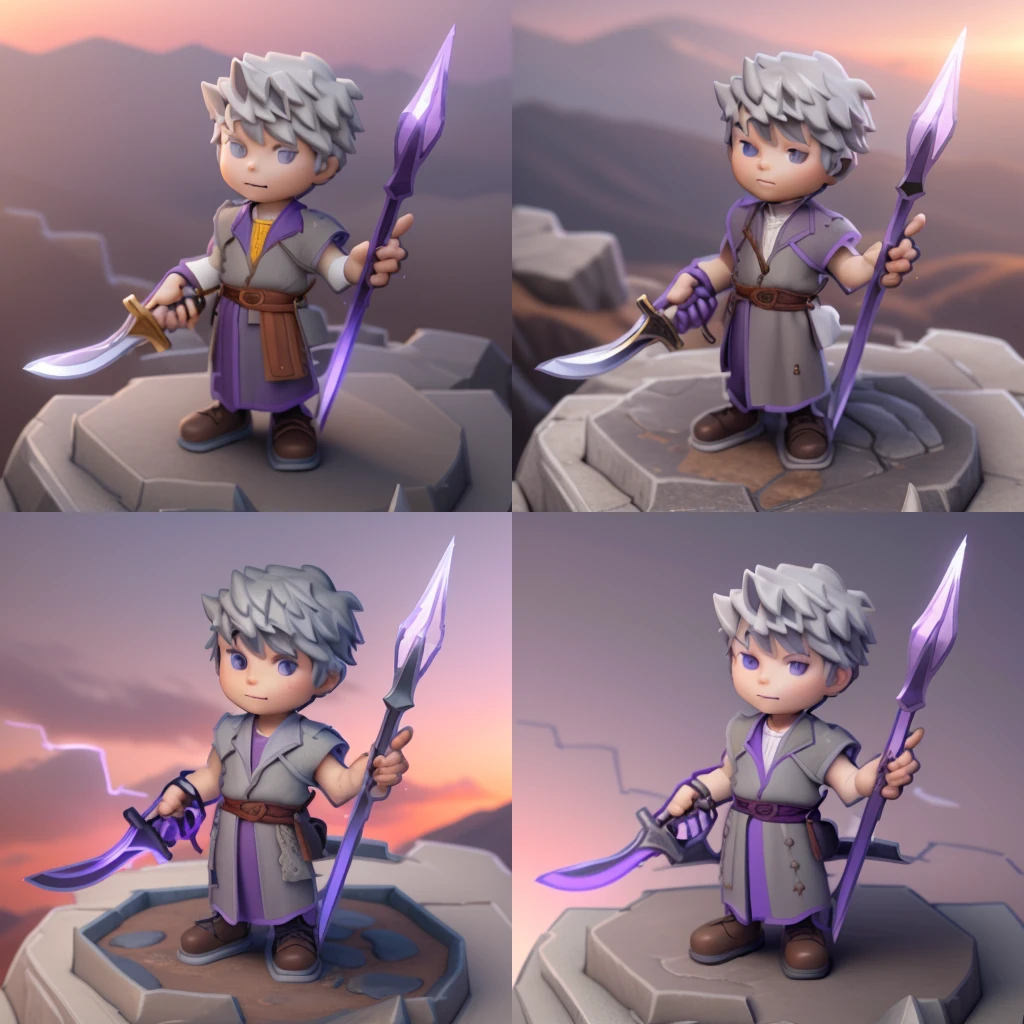
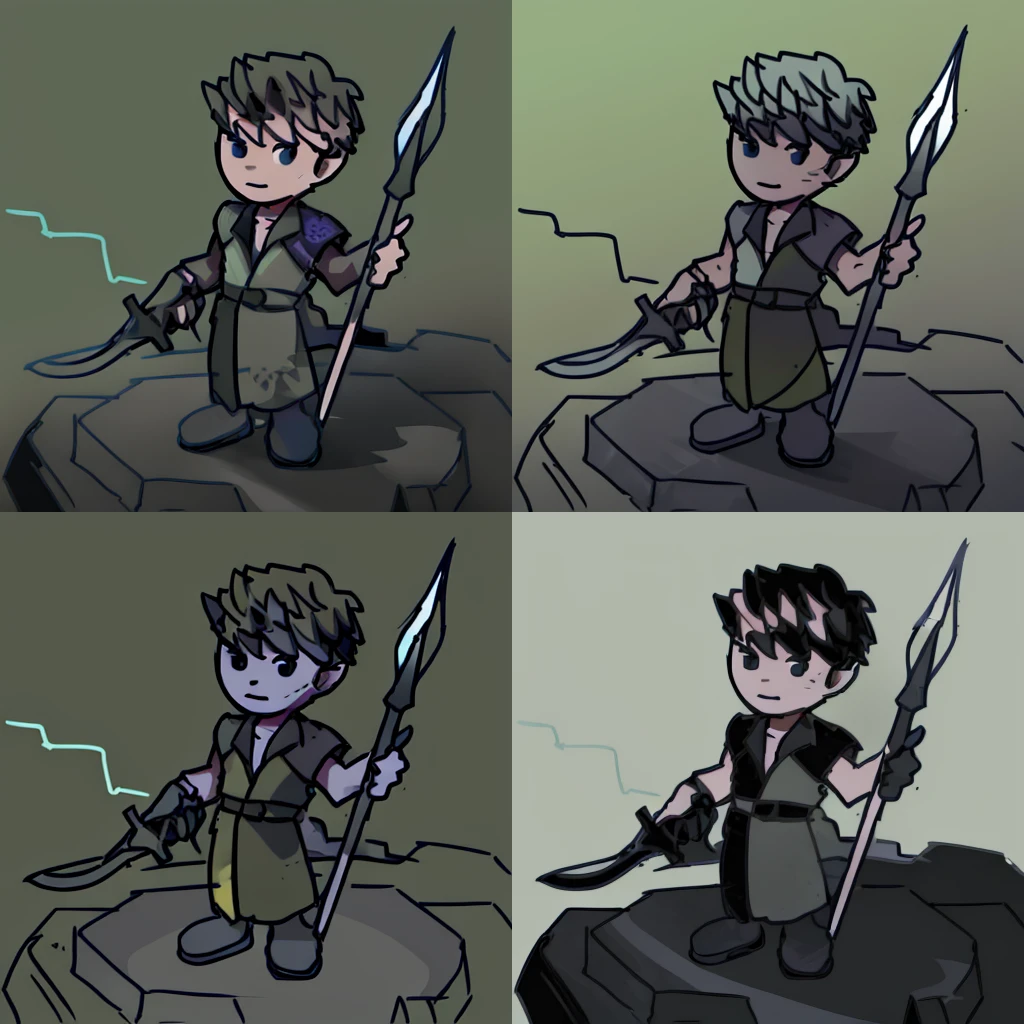
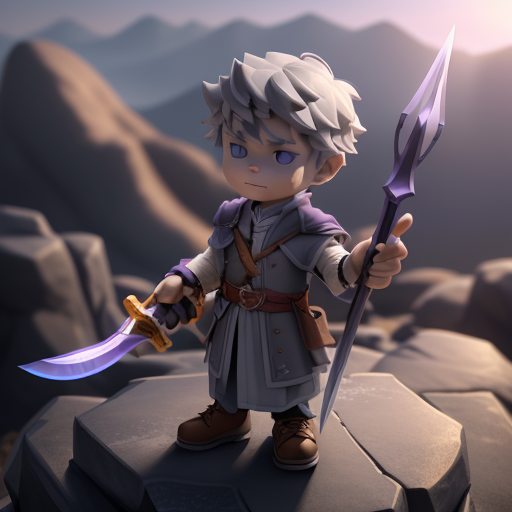
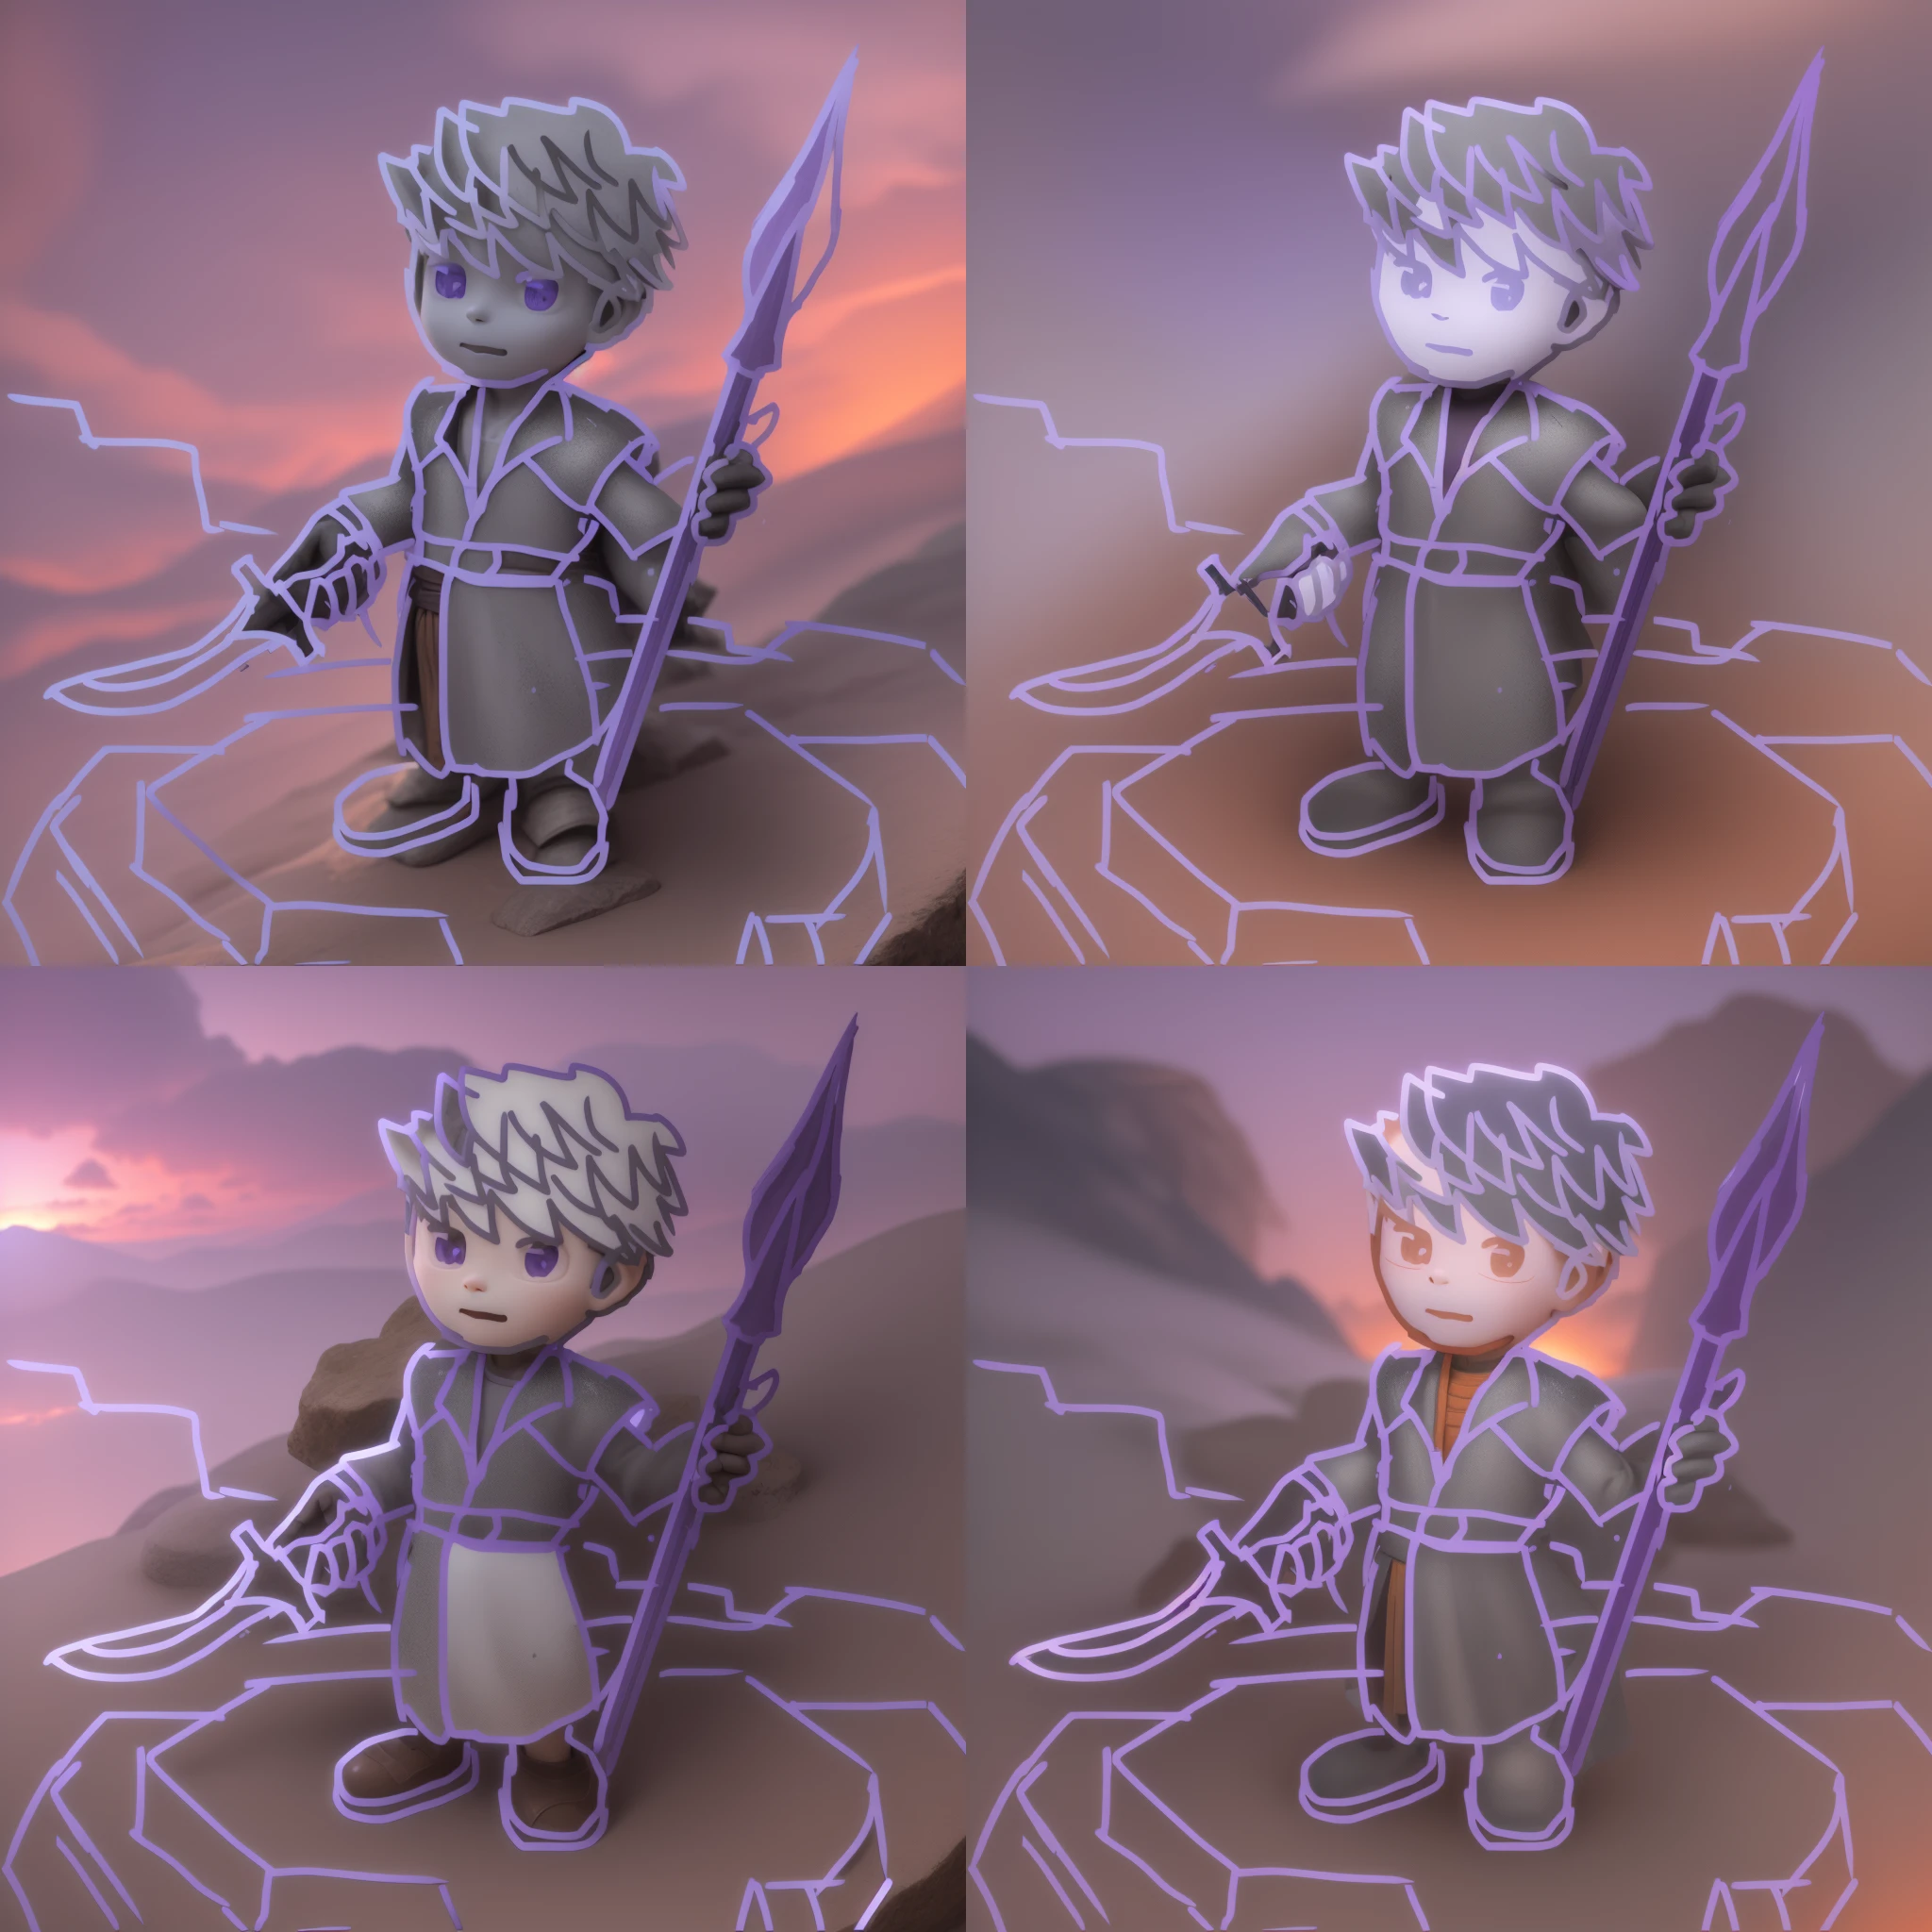
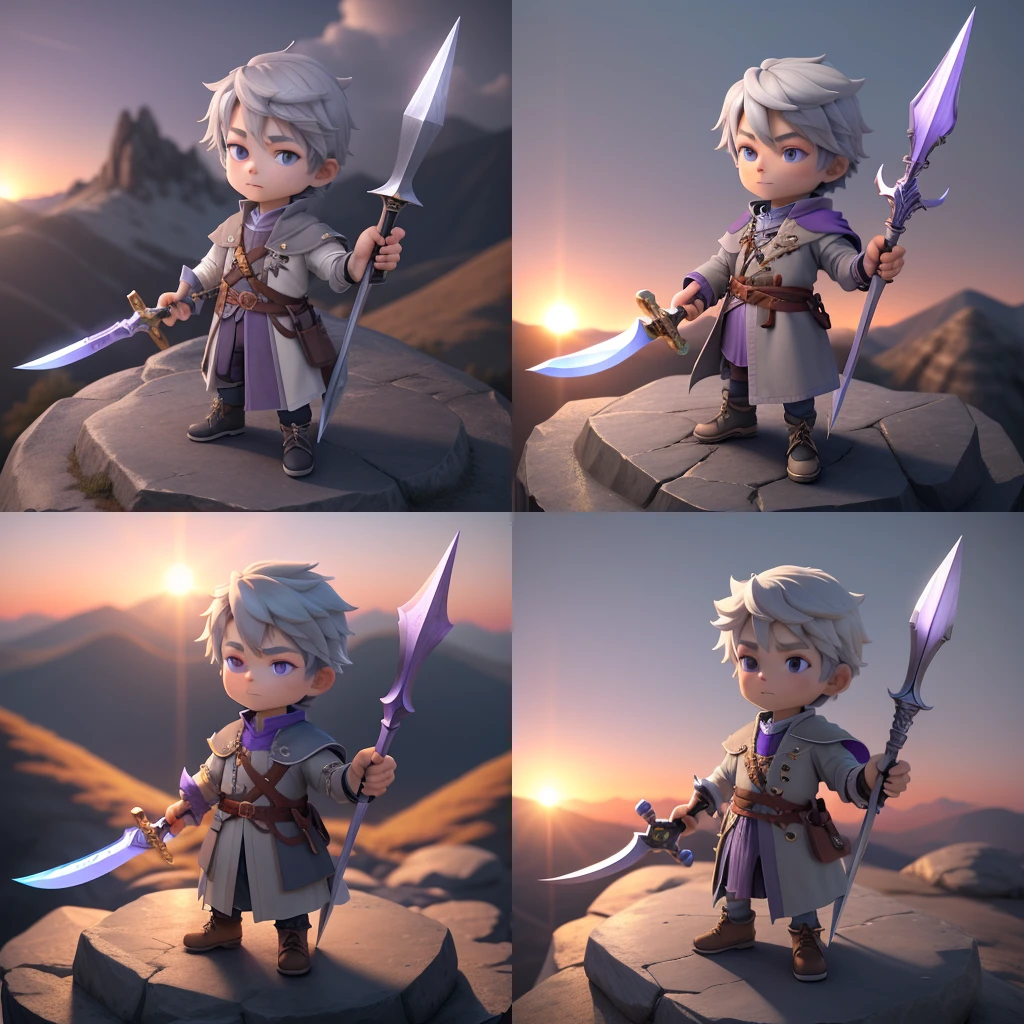
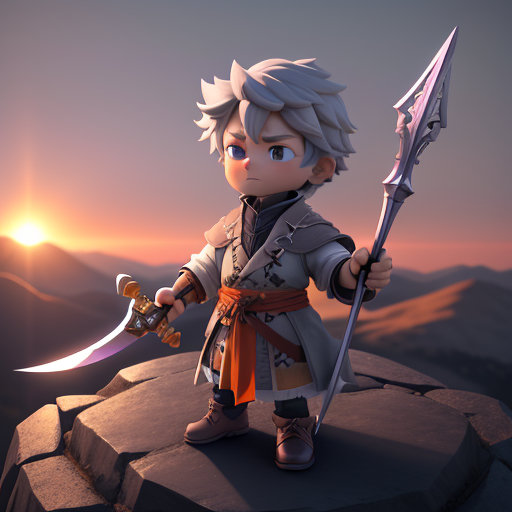
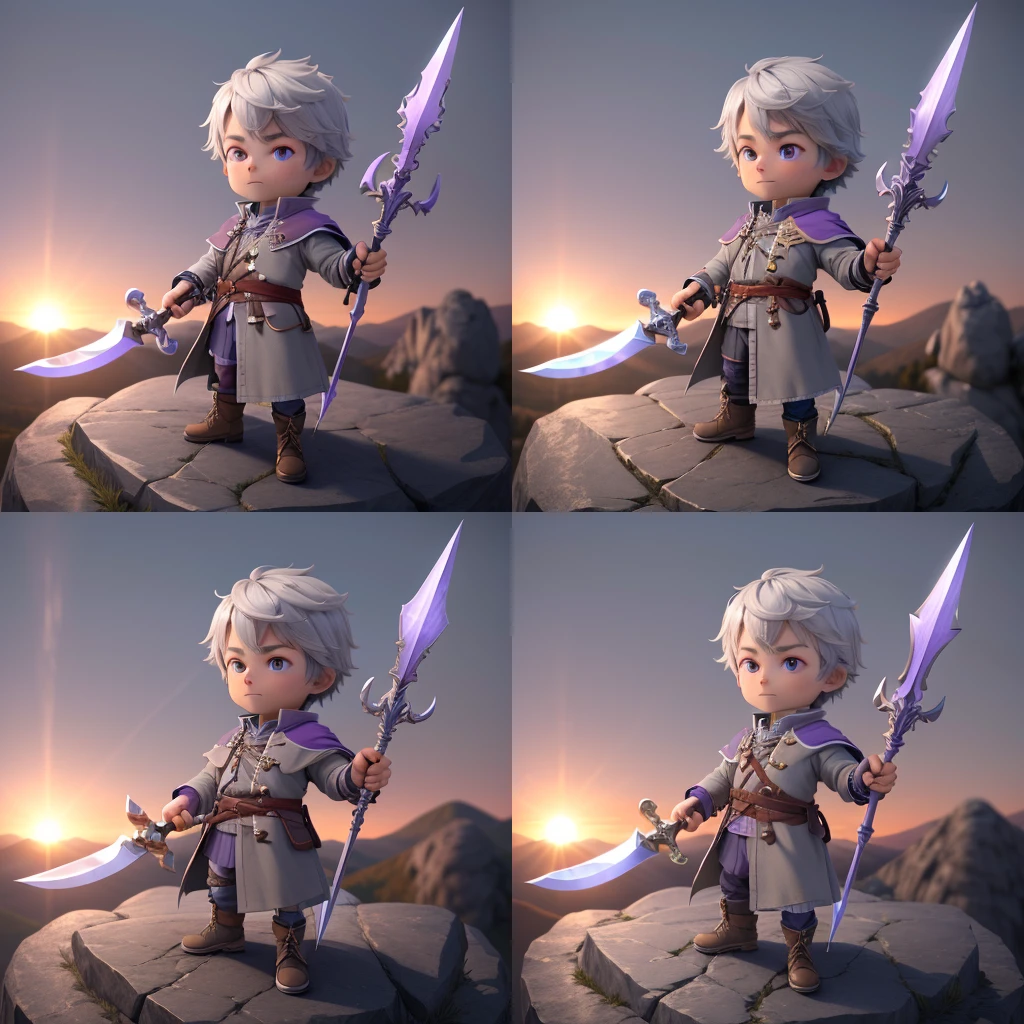
ここから、Weightを下げて、AI(モデル)に描写を任せてみる
ControleWeight:0.8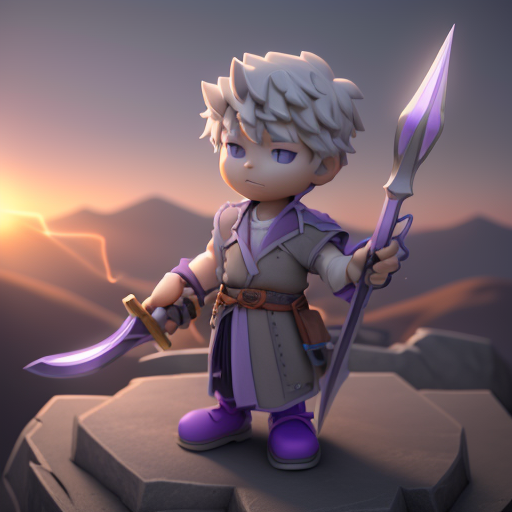
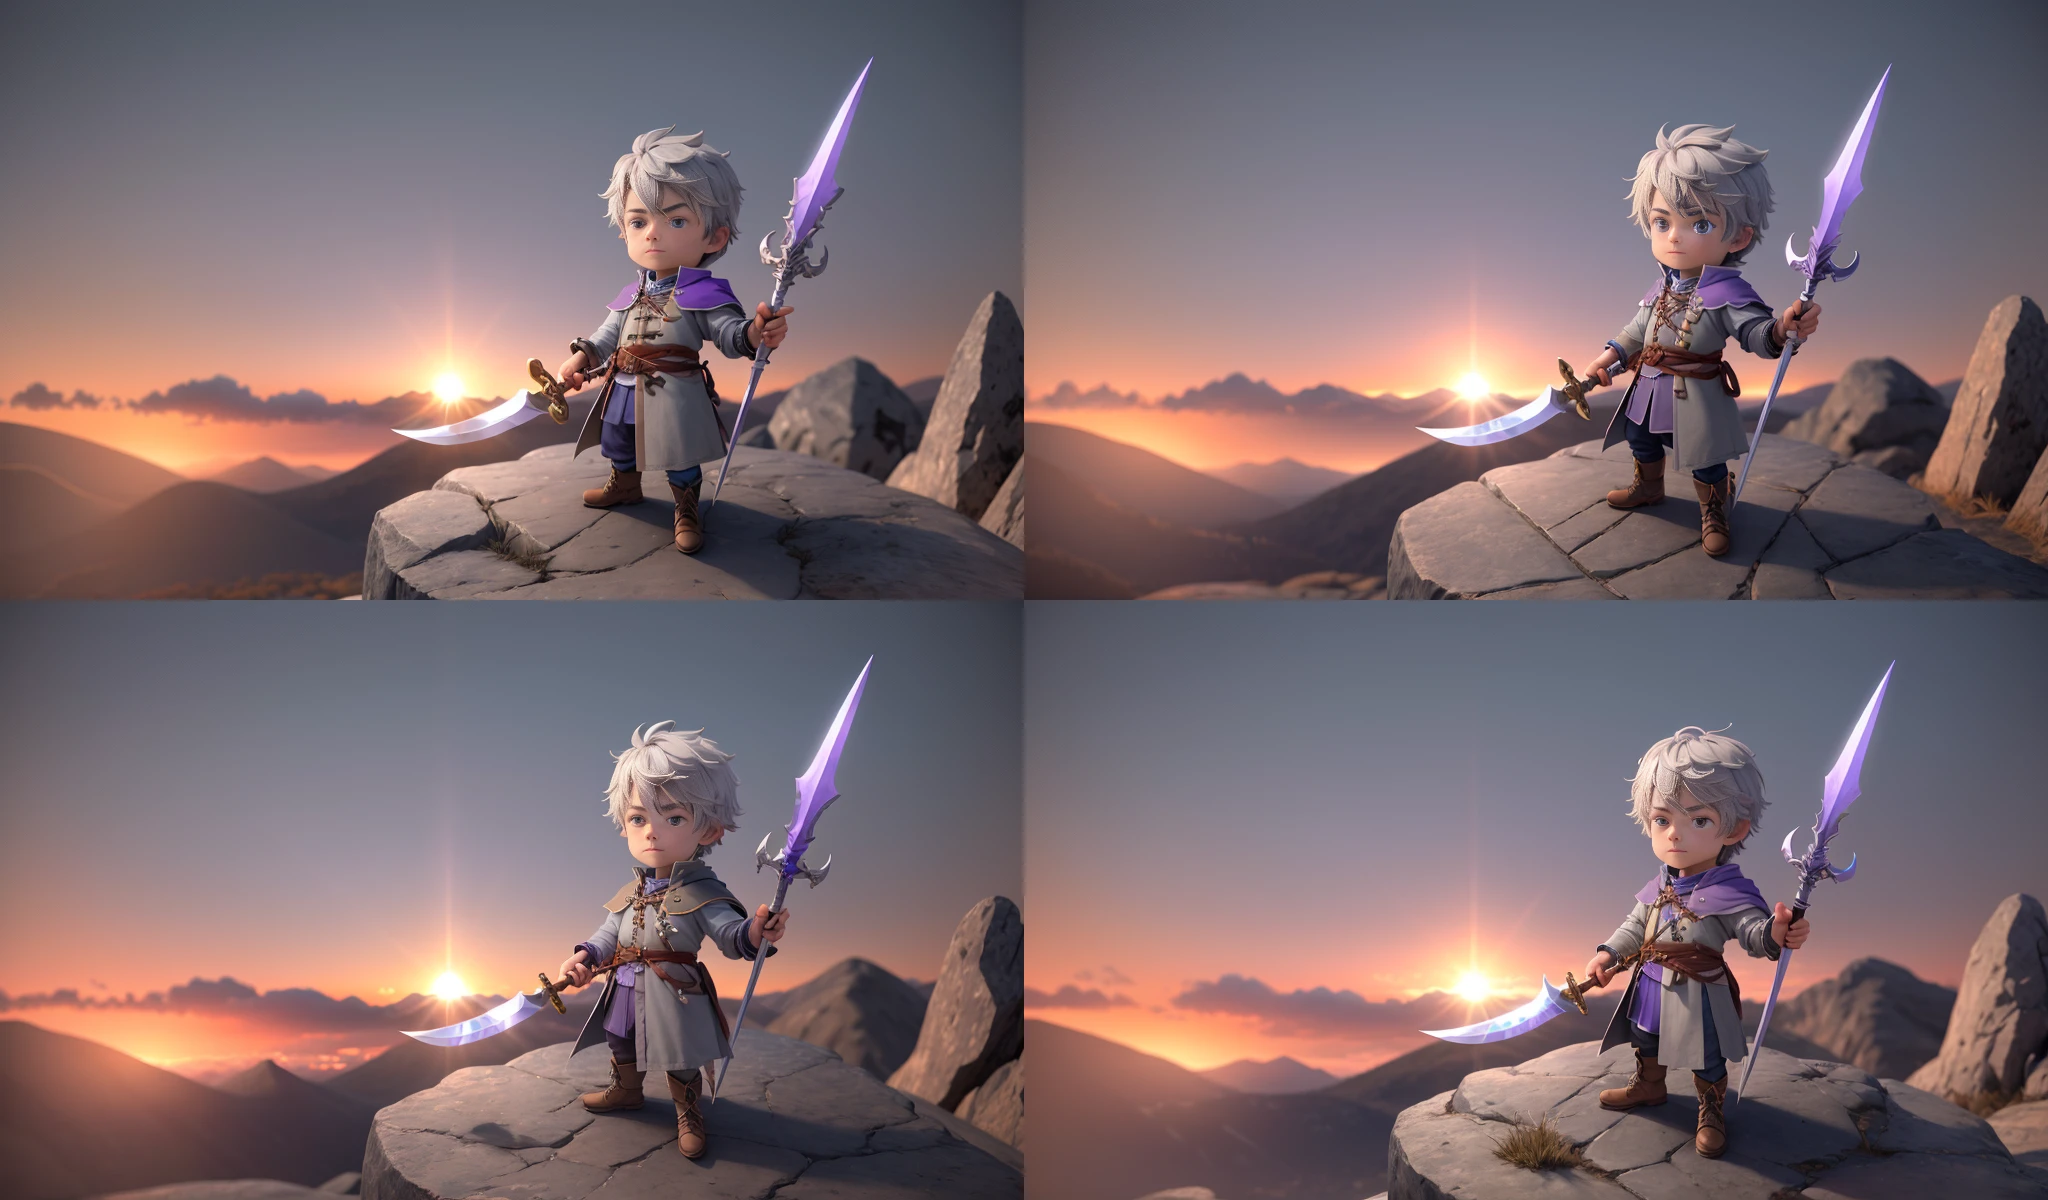
ControleWeight:0.7(プロンプトに何か?を加筆)

ControleWeight:0.6
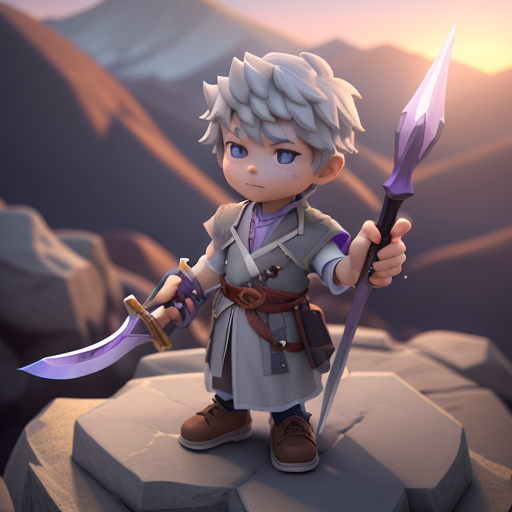

ControleWeight:0.5
不思議とだんだん良くなるな。モデルのデフォルトの造形に近づいていくのだろう
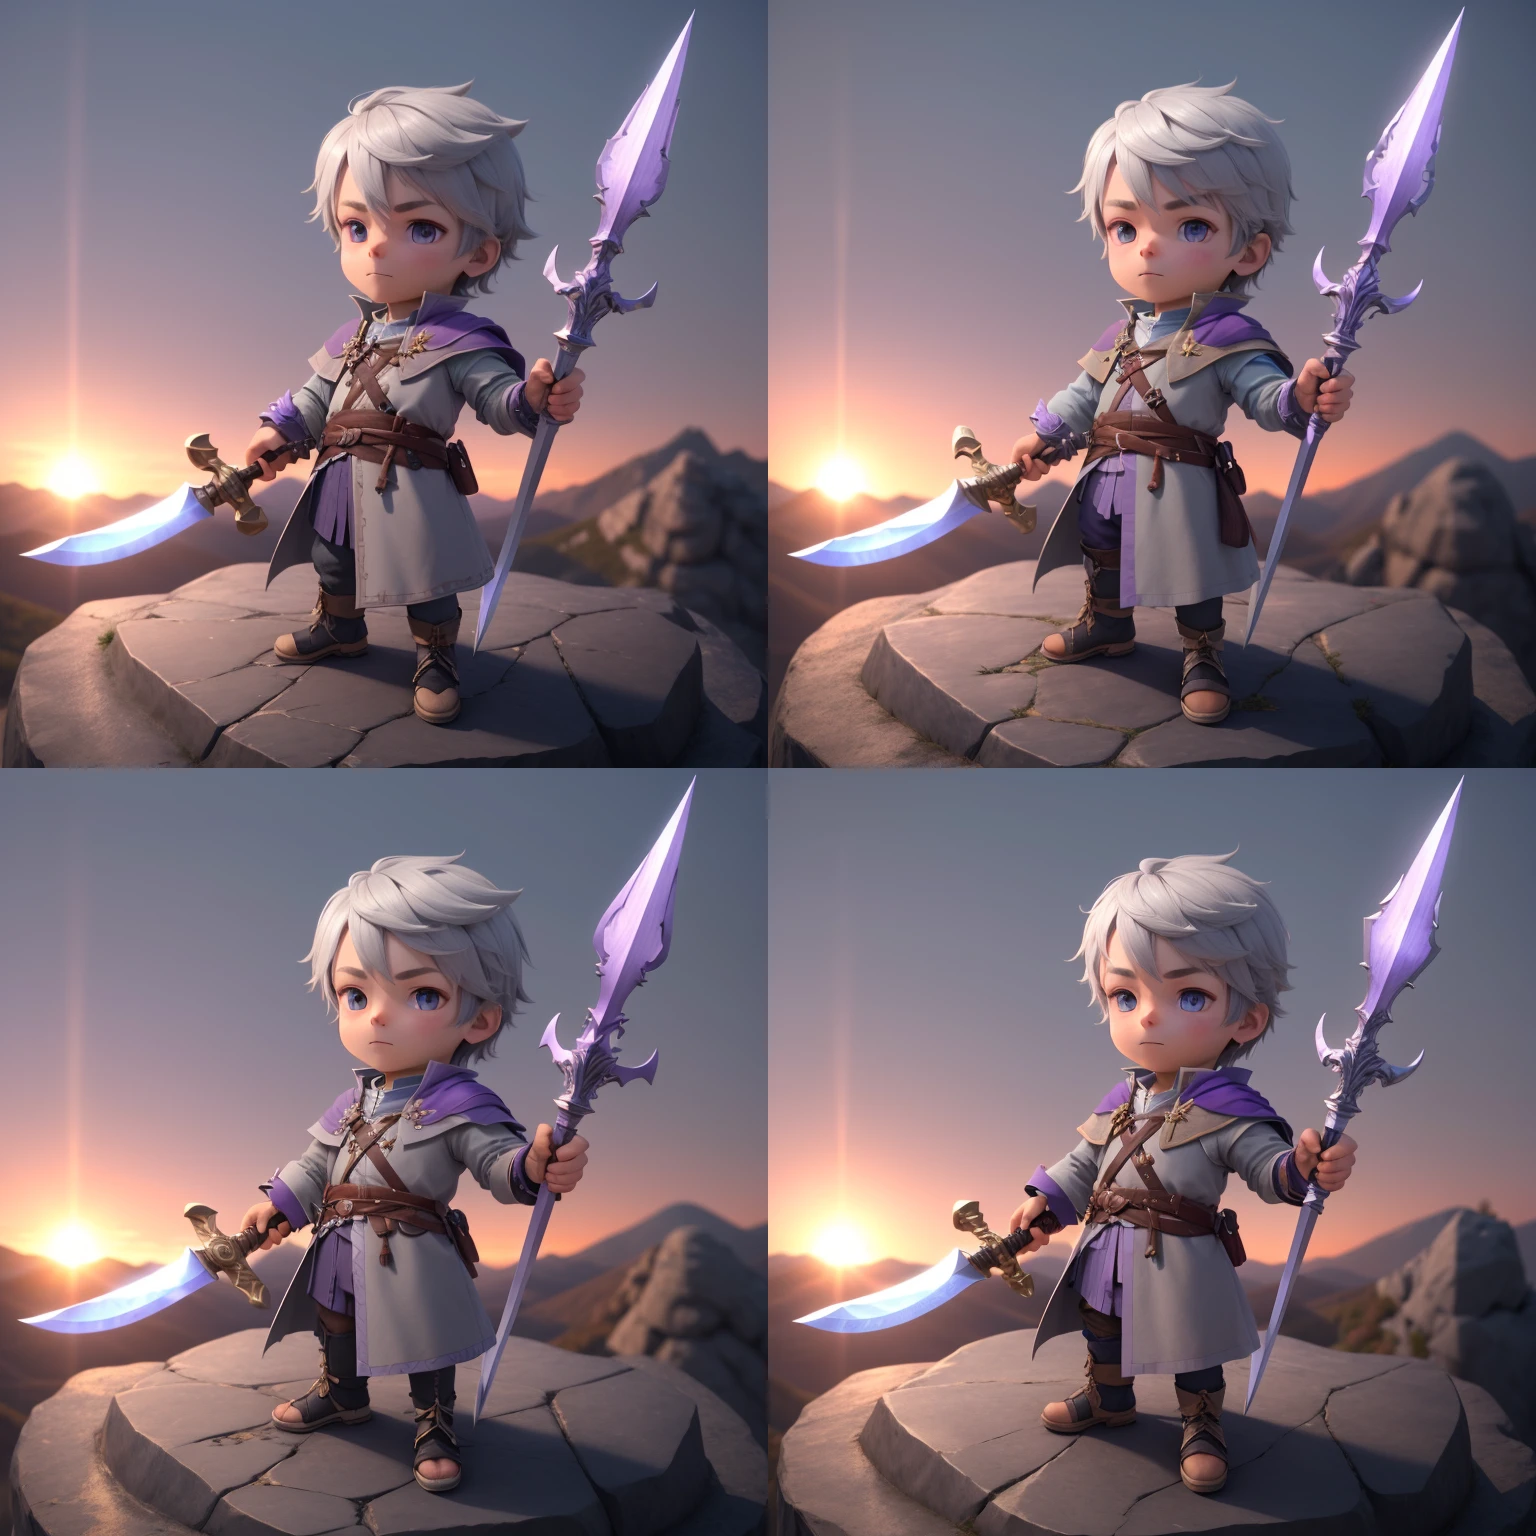
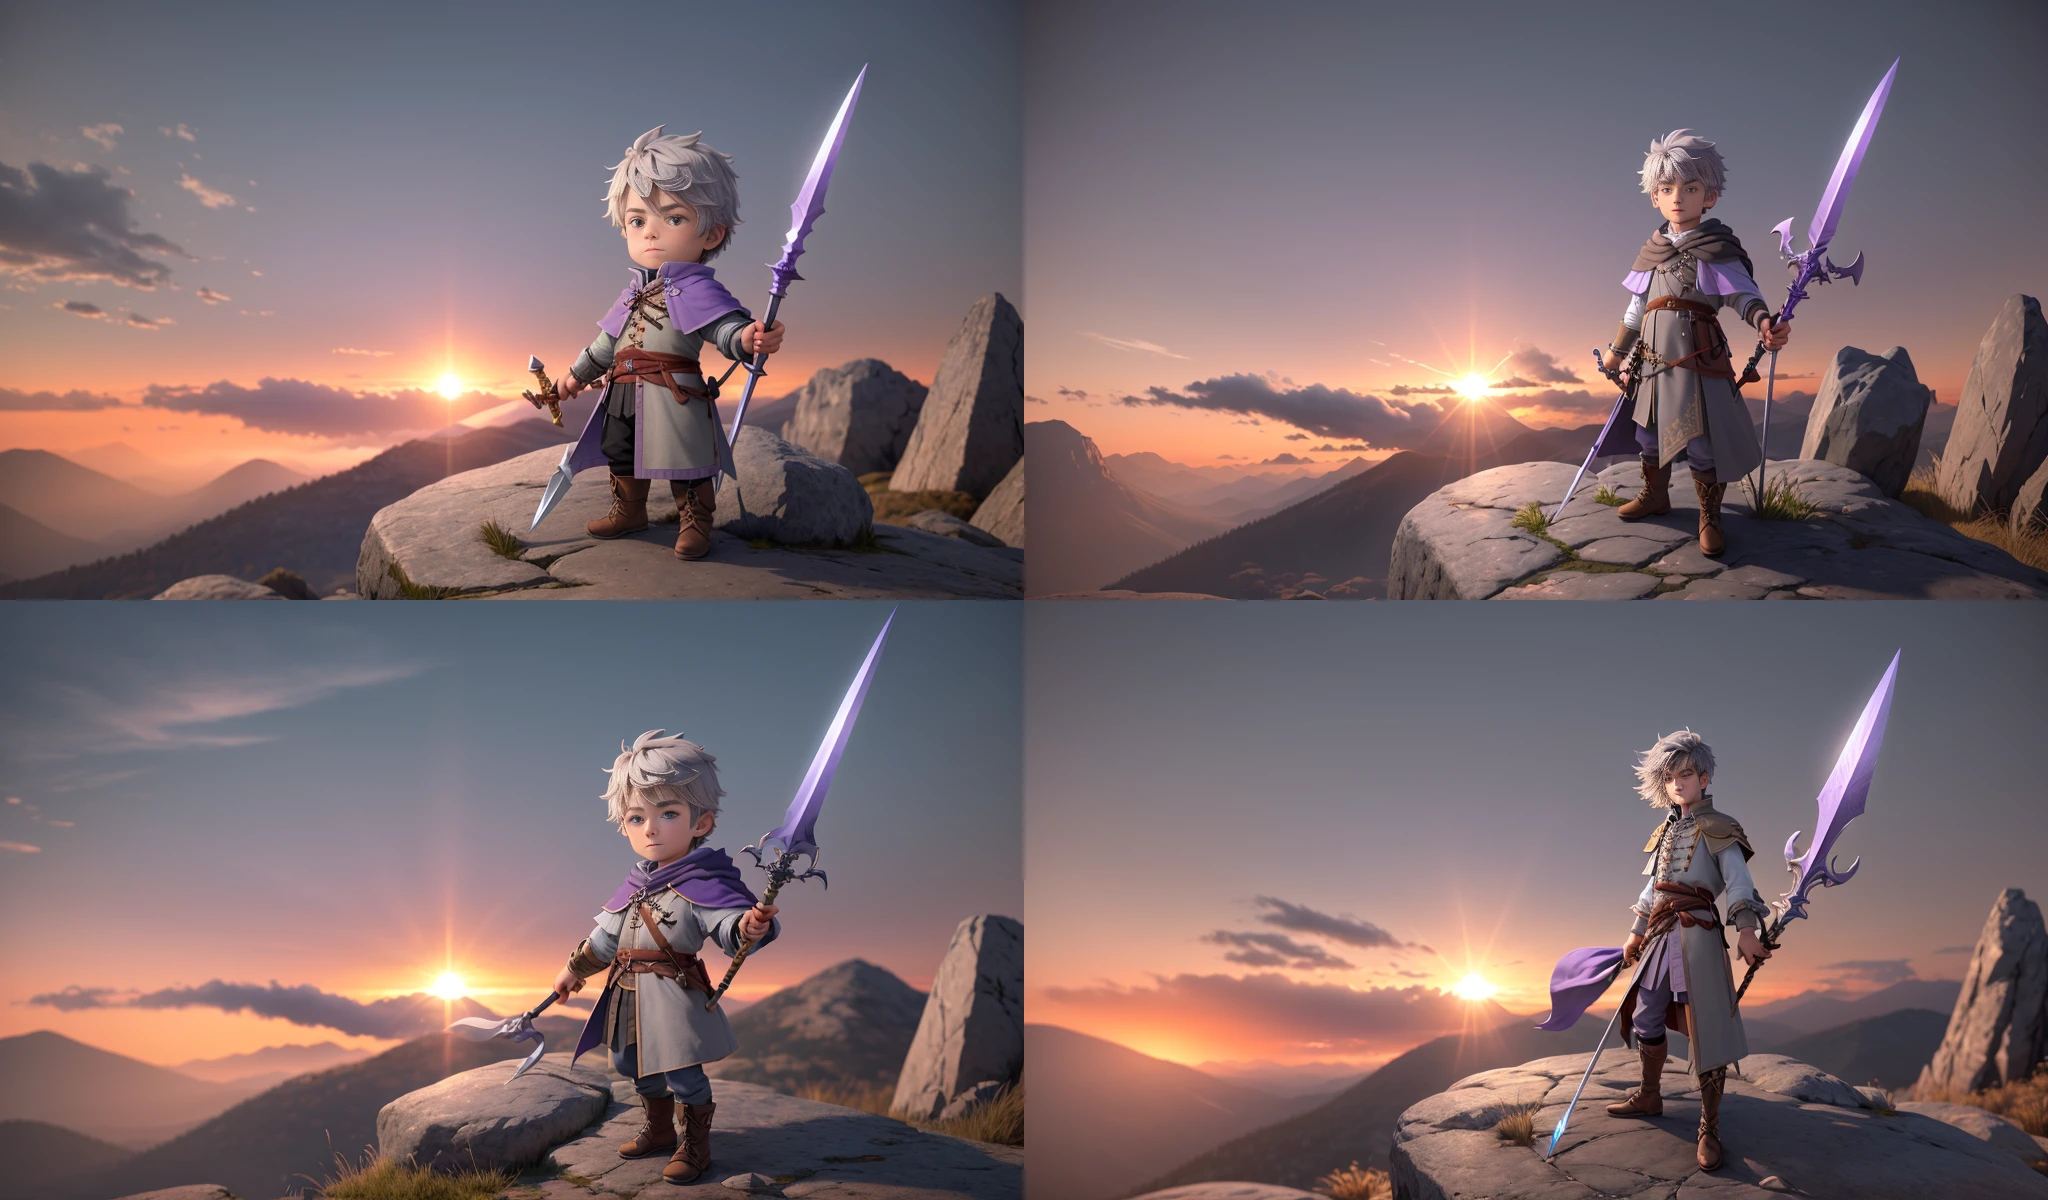
逆にweightを上げると…
Control Weight:1.2
線が出てくる
Control Weight:1.3だと
元絵の線が押し出される
結論
ControlNetType:Canny
ControleMode=balanced では
ControleWeightを低めにしてモデルの描写に任せるのが良い
ControleModeの変更
ControleModeを「Prioritize Prompt(プロンプト優先)」にしてみる
プロンプトは
「3D render of a beautiful and cute boy holding a sword in his right hand and spear in his left.he is wearing a surcoat colored in gray and violet and standing on the top of rocky hill in the mountain area at dusk.he is lighted from the front by sunlight and shadow is casted down on the ground.beautiful sky.high quality.masterpiece.sunset.detailed expression of hands and fingers.((strong light and shadow))((high contrast)).dramatic lighting.cinematic..3 point lighting.」
Weight:0.7
0.9
0.9(別の文言を加えている)
プロンプトに、ライティング系の文言を加えたら暗い絵になったので削除
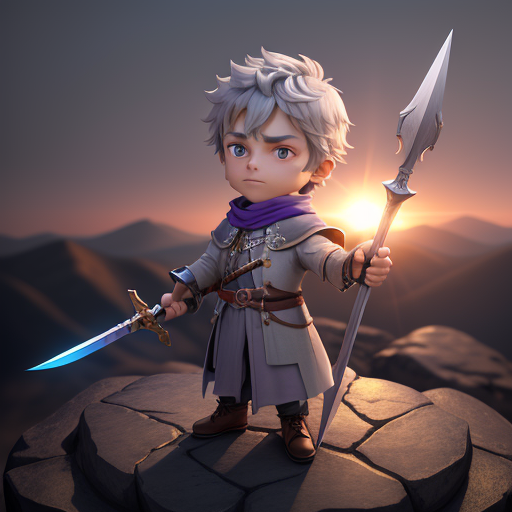
Weight:1.0
プロンプトは「3D render of a beautiful and cute boy holding a sword in his right hand and spear in his left.he is wearing a surcoat colored in gray and violet and standing on the top of rocky hill in the mountain area at dusk.he is lighted from the front by sunlight and shadow is casted down on the ground.beautiful sky.high quality.masterpiece.sunset.detailed expression of hands and fingers.」
Weight:0.6
下げると描写が崩れるね。
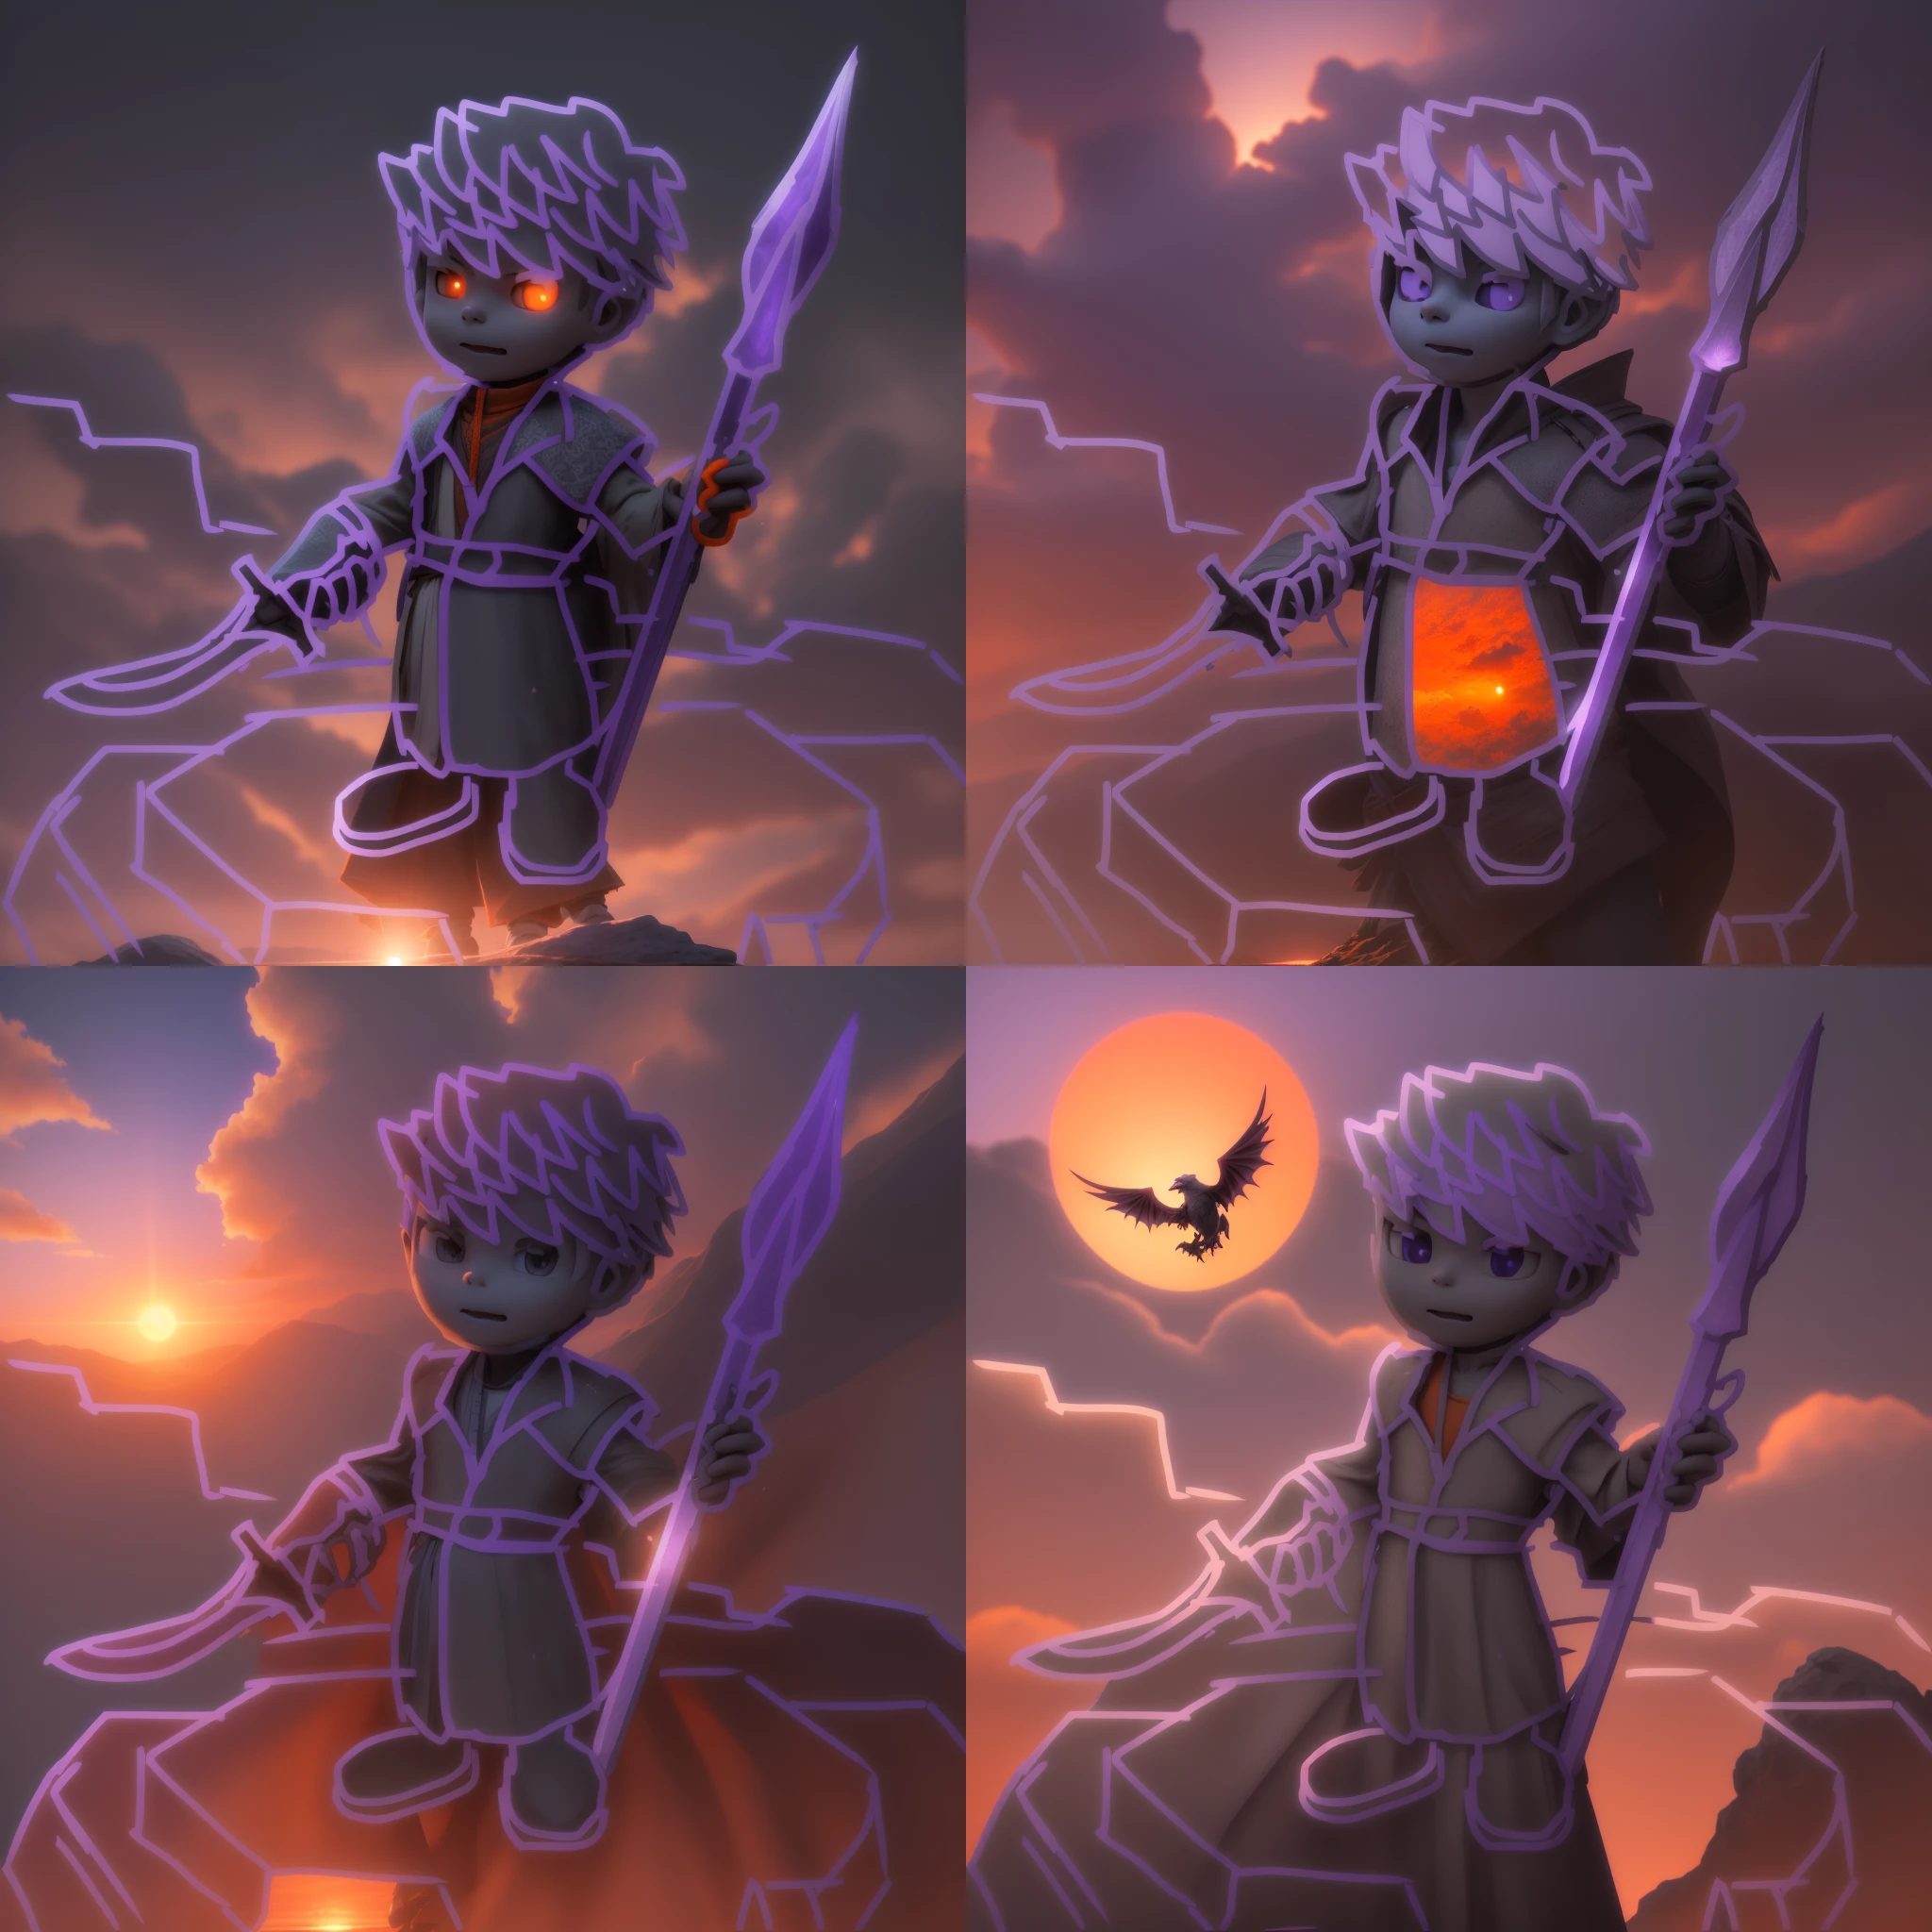
プロンプトを更に詳細にして
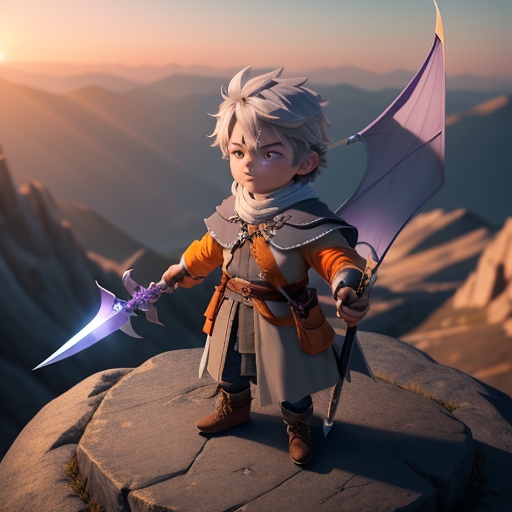
「3D render of a beautiful and cute boy holding a sword in his right hand and spear in his left.he is wearing a surcoat colored in gray and violet accent and standing on the top of rocky hill in the mountain area at dusk.he is lighted from the front by strong sunlight and shadow is casted down on the ground.strong orange ambient light.a few winged-dragons are flying around in the beautiful sky.A magical tower is seen in the far distance.high quality.masterpiece.sunset.detailed expression of hands and fingers.((strong light and shadow))((high contrast)).dramatic lighting.cinematic..3 point lighting.」
Weight0.9で

別の意匠が混じった
0.8
顔が変わった
Weight0.5

やはりWeightを下げると描写が崩れる
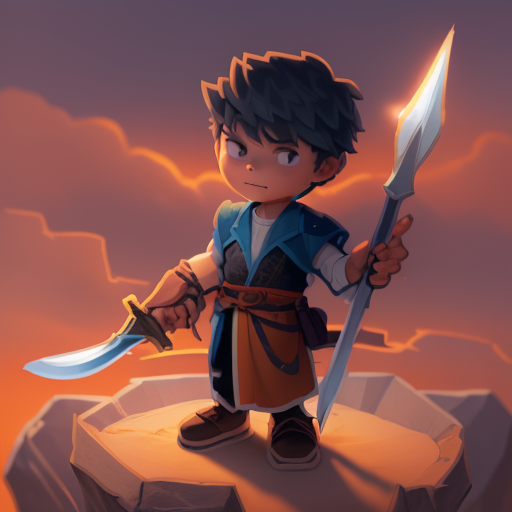
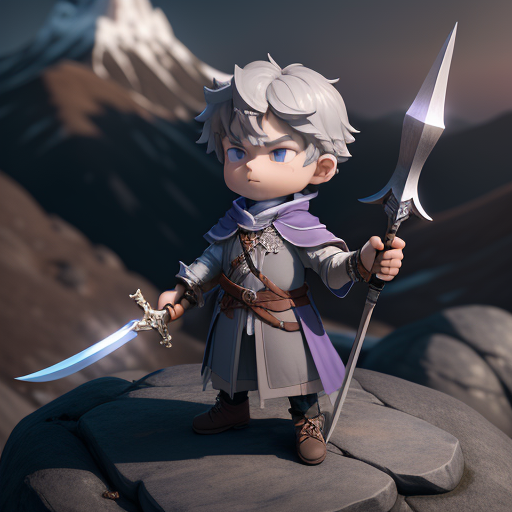
Weightを逆に強くする
Control Weight:1.1
非常に良いね
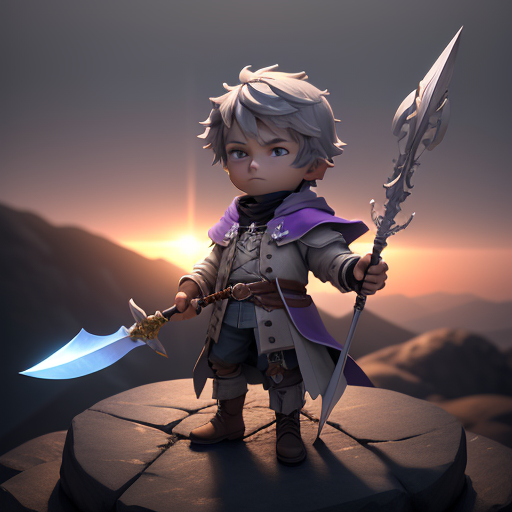
Control Weight:1.3
良さげだ
ちなみに全く同じプロンプトのT2Iだとこうなる

ControleNetの偉大さが分かる…
結論
ControlNetType:Canny
ControleMode=Prioritize Prompt では
ControleWeightは高めの方が良い
増やし杉プロンプト
プロンプト優先
ControleMode=Prioritize Prompt にて
元の線画に無い要素をプロンプトに加えると、複雑怪奇な絵になってしまう。
プロンプト「3D render of a beautiful and cute boy holding a sword in his right hand and spear in his left.he is wearing a surcoat colored in gray and violet accent and standing on the top of rocky hill in the mountain area at dusk.he is lighted from the front by strong sunlight and shadow is casted down on the ground.strong orange ambient light.a few winged-dragons are flying around in the beautiful sky.A magical tower is seen in the far distance.high quality.masterpiece.sunset.detailed expression of hands and fingers.((strong light and shadow))((high contrast)).dramatic lighting.cinematic..3 point lighting.」
ドラゴンとか塔を加えたかったが…
Weight1.0

Weight1.1

人物に羽がついたり構図やプロポーションが崩れてしまう。
バランス
同じプロンプトで「balanced」にすると…
Weight1.0
どひゃ~
Weight0.9
(ここで弾切れ…)
作成する画像のサイズ(Image Mode)
気づいたのだが、これを変えるだけで絵がガラッと変わる…条件が複雑すぎやろ
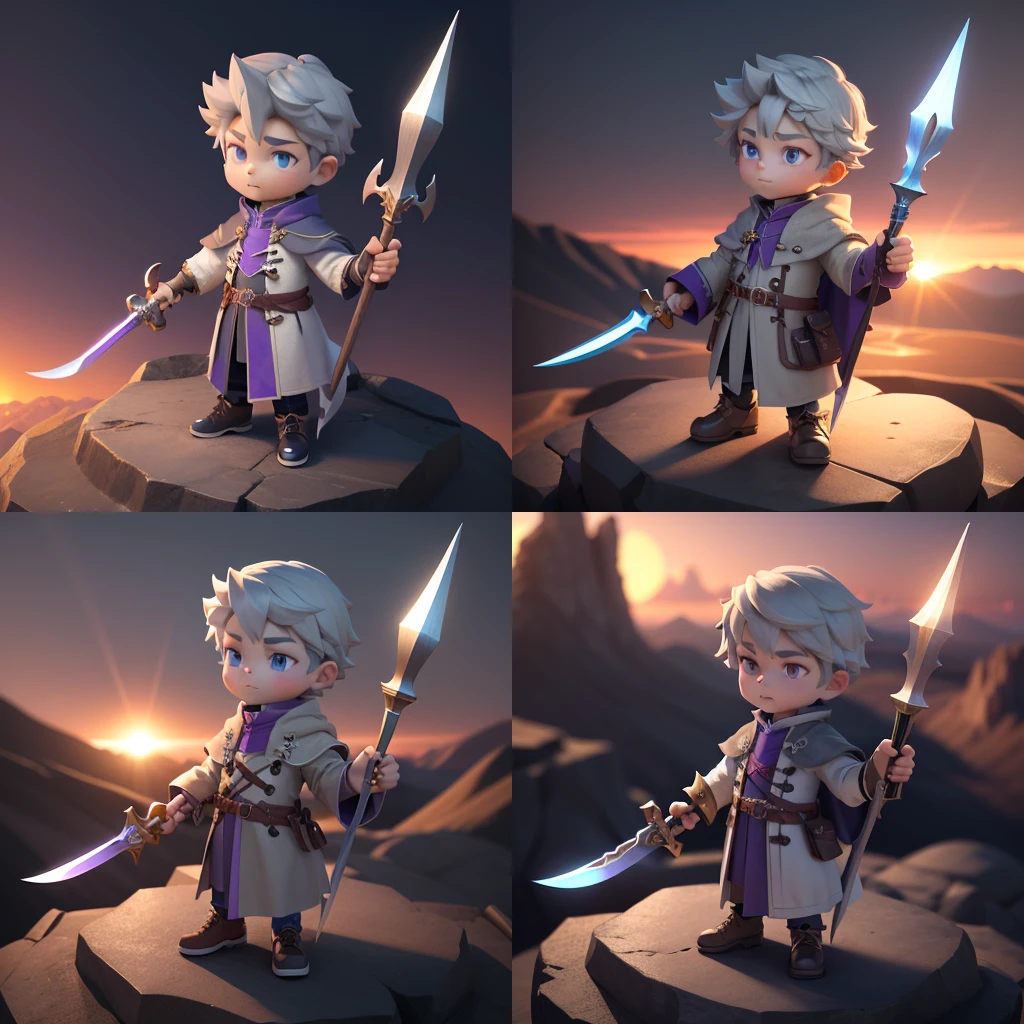
比較
共通条件
ControlNet:Canny
元絵

Mode:Prioritize Prompt
Weight:1
モデル:RevAnimated
プロンプト「3D render of a beautiful and cute boy holding a sword in his right hand and spear in his left.he is wearing a surcoat colored in gray and violet and standing on the top of rocky hill in the mountain area at dusk.he is lighted from the front by sunlight and shadow is casted down on the ground.beautiful sky.high quality.masterpiece.sunset.detailed expression of hands and fingers.」
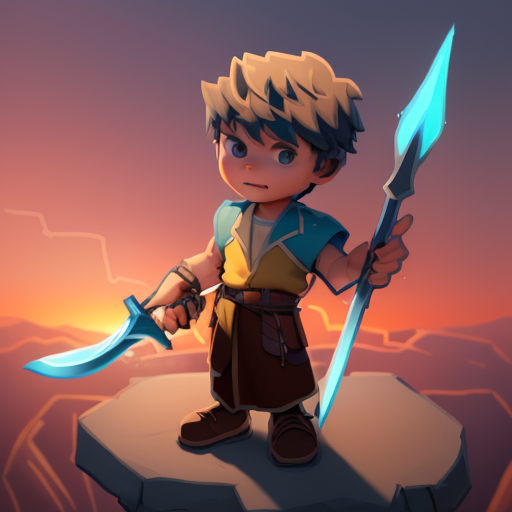
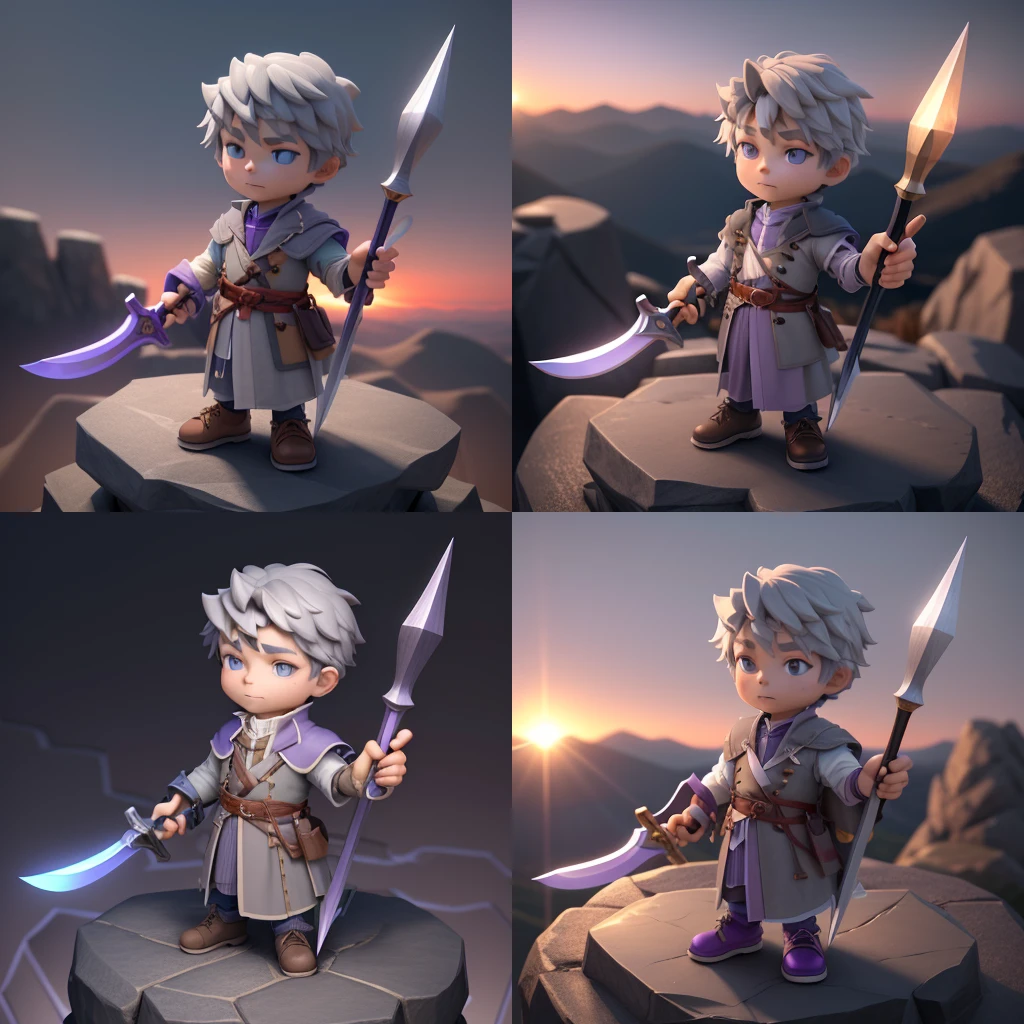
ImageMode:Standard
ImageMode:High Quality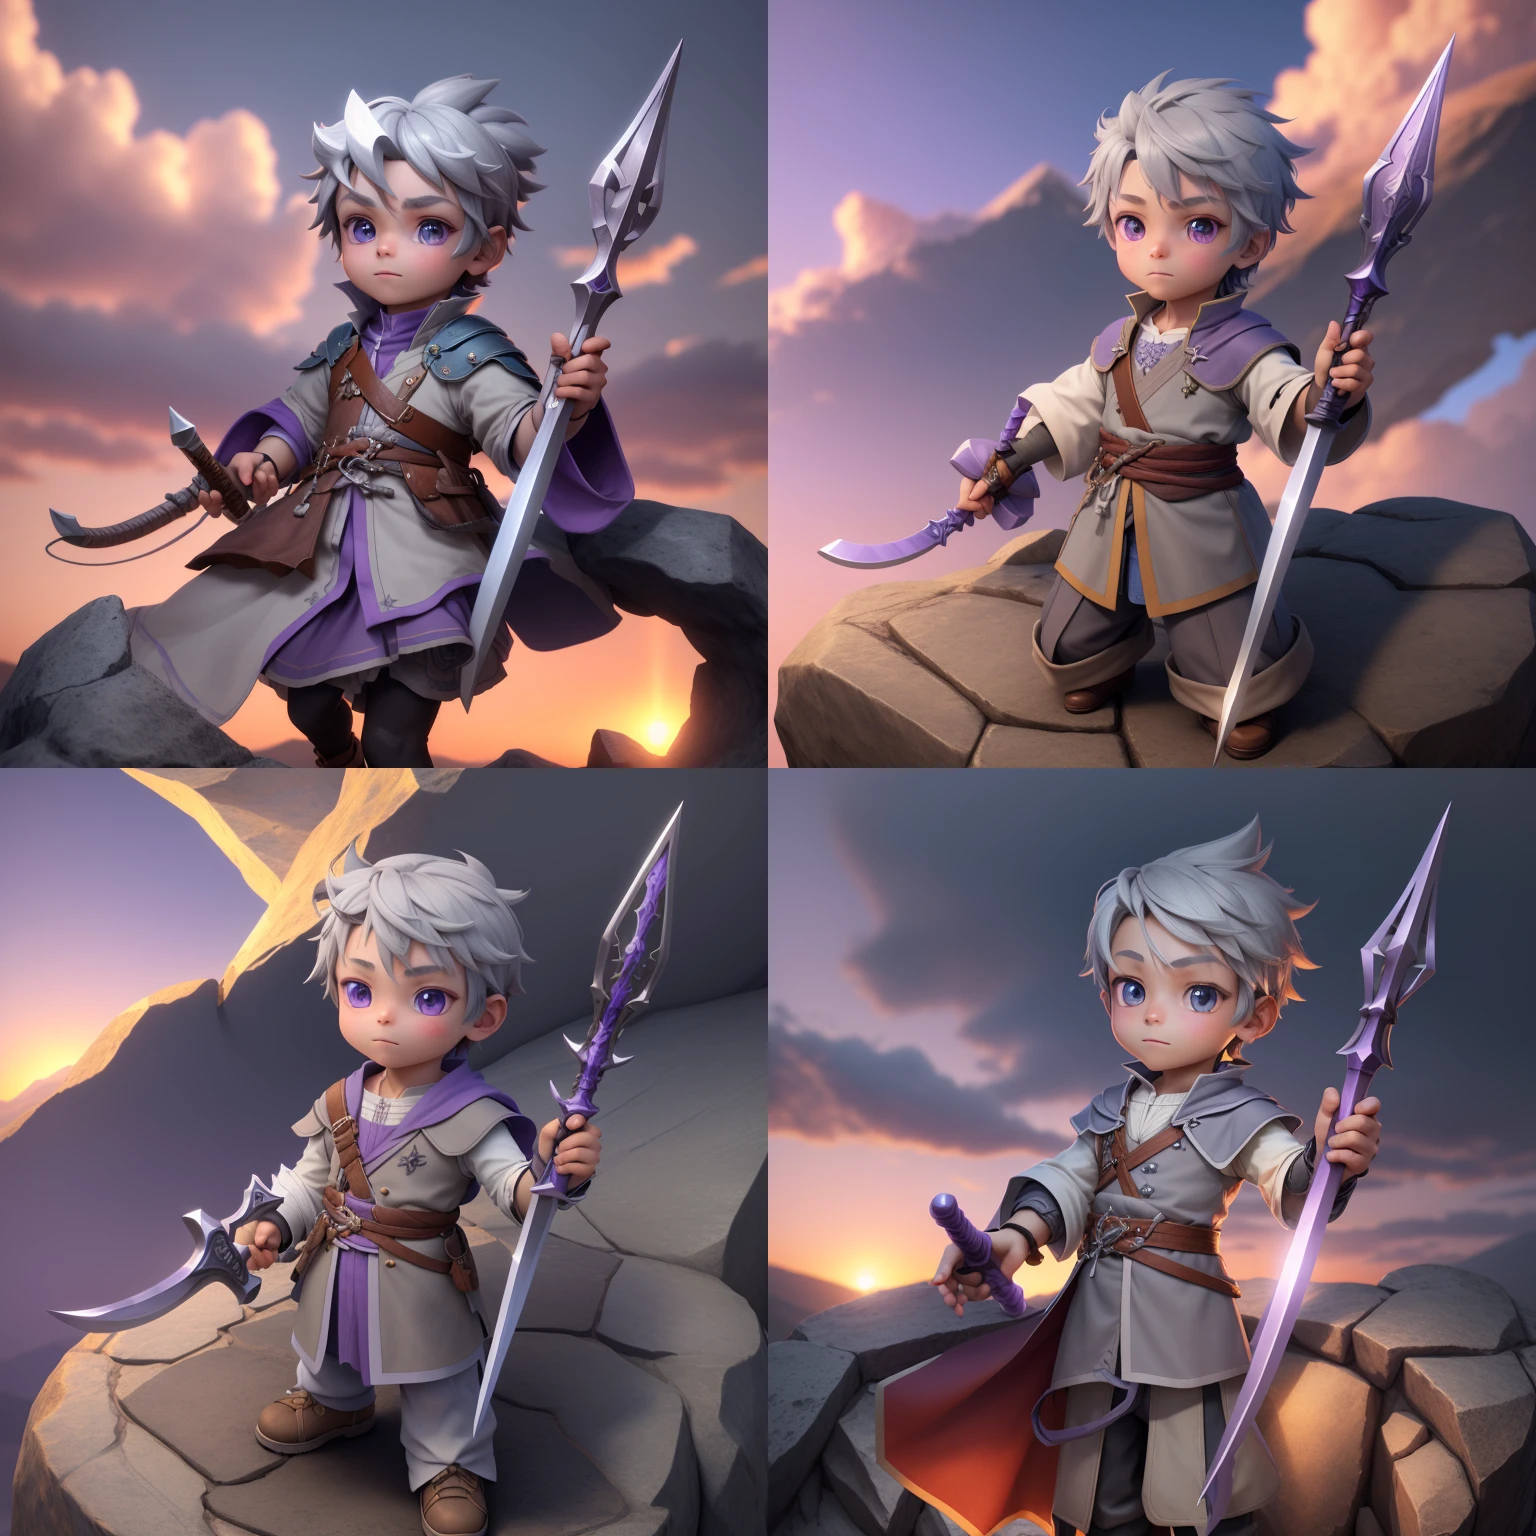
ImageMode:Ultra High Quality
ビックリするくらい変わるな。「構図やポーズをコントロールして元絵を清書させる」という目的ならStandardが一番良いね
standardだと解像度が512*512なので、もっと高い解像度が必要な場合がある
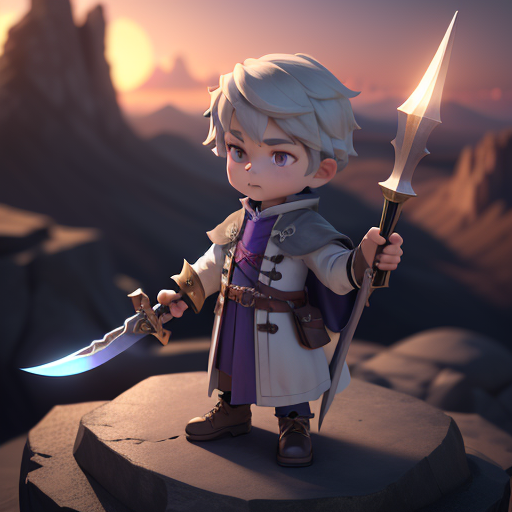
解像度を後から上げる
standardのうち、
例えば右上のイメージ(512px*512px)
こいつの解像度を上げるには2つの方法がある
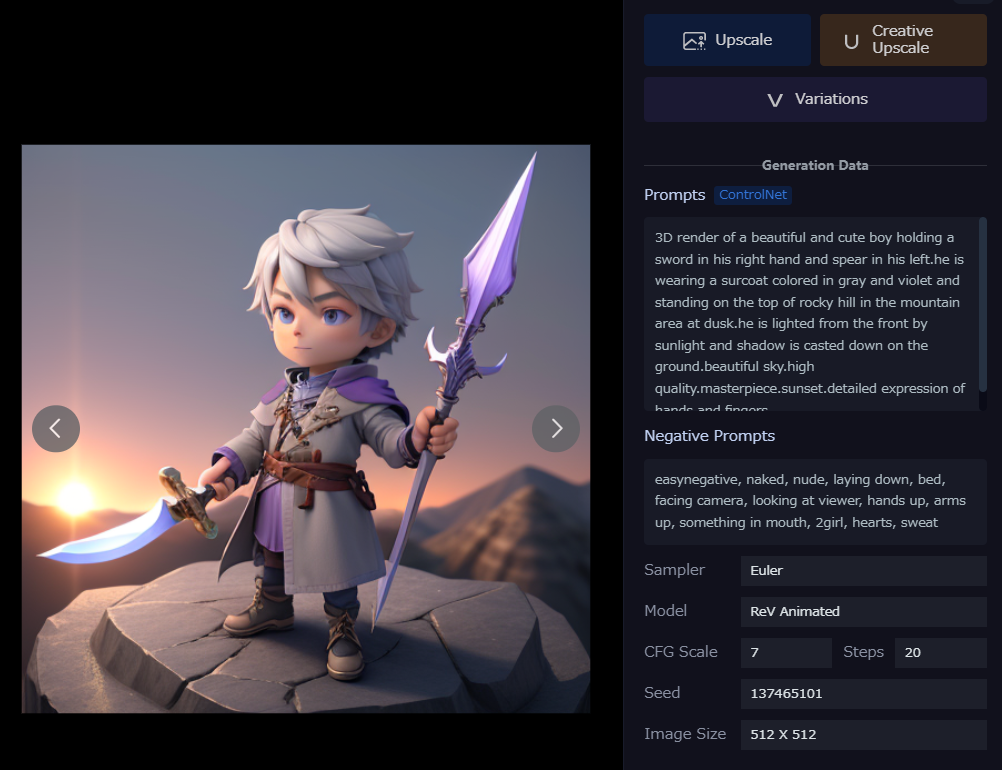
画面右上の「Upscale」と「Creative Upscale」で
その下の「Variation」はImage2Imageに遷移する(後述)
前者は単に解像度を上げてくれる(倍率を選べる。ここでは2倍)
後者は解像度を上げてもう一度書き直す
構図は同じだが、顔や服の造形だけでなくライティングや背景まで変わってしまう(軽くI2Iにかけた感じ)
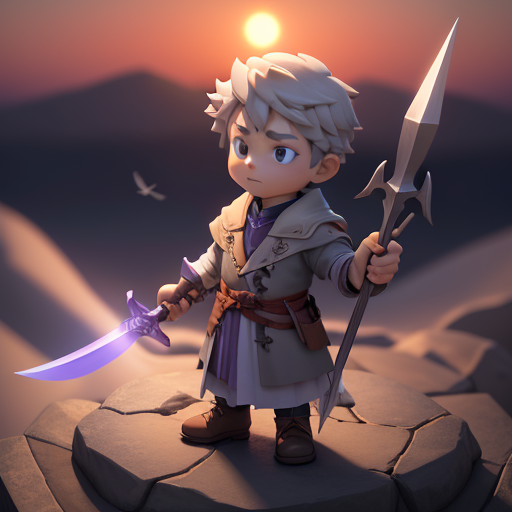
バリエーションを作る
I2I
また先程の画面右上の「Variation」からはイメージをI2Iに送ってくれる
ここでも解像度の設定で結果が変わり、denoising strengthを0.35(デフォルト)共通でも
Standardでは
High Qualityでは
顔の造形が結構変わる。
Expansion
先程の画面
ここで右クリックから「画像のurlをコピー」しておき、「Expansion」に移動して、urlから画像を読み込む。モデルが自動で変更されたが元「RevAnimated」に戻す
またブラウザのタブを複製などで生成画面をもう1つ出してコピーした元のプロンプトを入力して

作成結果
これが1番良い(1024*600)

このイメージをもとにまた「Upscale」「Variation(I2I)」をすれば良いかな
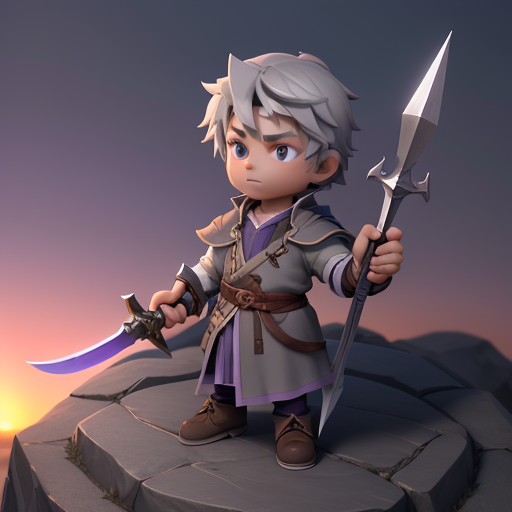
Variationの結果
共通設定は(ImageMode:Ultra Highにしないと顔が崩れる)(Restored Faces:on)
denoising strength:0.35(デフォルト)
denoising strength:0.4
denoising strength:0.5
denoising strength:0.6
顔の描写や頭身が変化していく
異なるタイプ
controlNetのタイプを「Canny」から「Sribble」にかえてみる
異なるモデル
「Rev」